Showing posts with label Sewing. Show all posts

Saturday, 26 March 2016

Astoria Tops By Colette Patterns' Seamwork Magazine

Hello. I hope you're enjoying the bank holiday weekend.  Hubby and I had a fun time yesterday taking photographs - outside was too sunny and inside was a bit dark. We did get some useable ones though, so here's the first of my new tops.


I do love my Cath Kidston skirts but as they have elasticated waists (which I like to cover) it's awkward finding tops to wear with them that sit nicely. I thought Colette's Astoria top would be perfect as it's quite short and fitted at the waist.

It's made out of black Ponte Roma which was really easy to work with - I probably should have started my jersey sewing with this rather than the slinky stuff. 


Hubby thinks I'm too old for them but I think they're fab. They have a gorgeous garden gnome one at the moment which may have to join my collection..........

I made the size as small as it comes for this one. It's perfect with the skirts but too short with jeans - even I think I'm too old for flashing my tummy!


So I made another one to wear with them. This time it's in grey Ponte Roma and I lengthened the sleeves and body by 2". 


The sleeves are hemmed and the neck topstitched with my Janome Coverpro that I got for Christmas. I'm slowly getting the hang of it and I love it. It gives the garment a professional finish even for a beginner like me.

It's a great pattern and I'll definitely be making some more.


I can never resist adding pictures of Maya so here's another photo that Hubby took yesterday.  

One last thing, as I've been sharing photos of myself I'll share some news too - I've decided to ditch the hair dye. I am sick of having it done and it never looks as nice as my natural colour did, so I'm going to let it grow and see what happens.  It's a good job I like wearing hats as I think I'll have one on permanently for the next year or so............or I may cut it shorter..............or I may hate it and dye it again.

Can grey haired ladies still wear Cath Kidston skirts?  You bet!

I'd better crack on. I have Clarity samples to make and with Hubby on leave I keep getting distracted. Don't forget that Paul Church is on Hochanda tomorrow (27th March) with More Clarity.  11-12am, 3-4pm and 5-6pm. 

Happy Easter

Lynne
x

Saturday, 30 January 2016

Sewing Machine Covers - Sew, Hem and Serge

Hello. I'm very low on cards to blog so I'm alternating them with sewing posts. Barbara is on Hochanda next Sunday though so I'll soon have some more that I can share.

As my sewing obsession has grown so has my sewing machine collection. I now have machines to sew, hem and serge (more about that word later) and they all needed pretty covers.


The fabric used on them all is from the Sew Retro range by Makower. They have fusible fleece stuck to the main fabric to give it a bit of body and are lined with white cotton.  

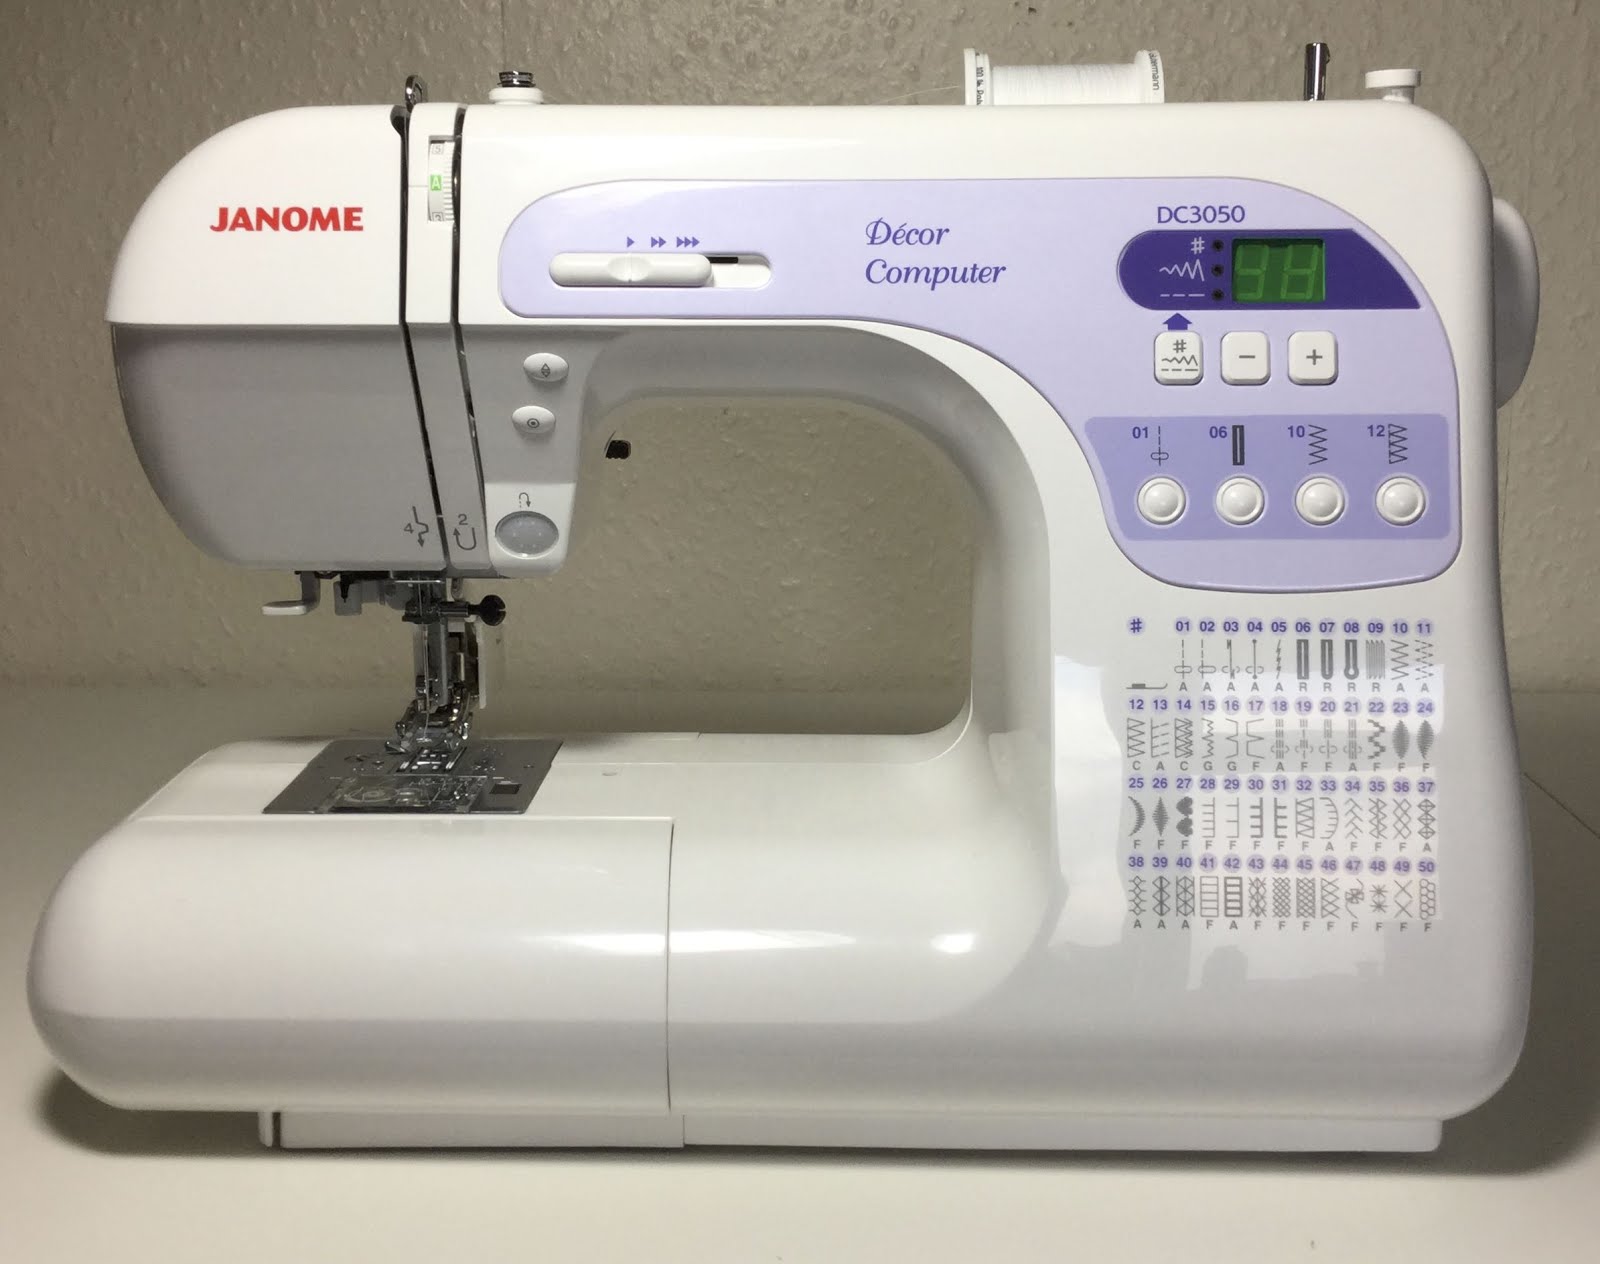
Sew - Janome DC3050. I have already blogged about making this and where the ideas came from here but since my collection and my skills have grown I've tweaked it a little bit, adding the "SEW" appliqué. I used my Sizzix Fun Serif dies to cut out the lettering and they're attached with Heat n Bond Ultra as I wasn't confident enough to sew around them.  The blue oval they're on was cut out with a Spellbinders die. I attached it with Heat n Bond Lite and then blanket stitched around it on the machine - I figured I couldn't really mess up an oval.


Hem - Janome CoverPro 1000CPX. This was a bit of an extravagance but it was my Christmas present and I love it! I've started sewing jersey and this is perfect for hemming it. This one did actually come with a decent vinyl cover but it didn't want to be left out.


The patchwork panels (front and back) were done with June Tailor's Quilt As You Go Pre-Printed Batting.......


.......which made it really easy. Although since then I've had a go at the real thing and I'm enjoying that too.

Serge - Janome 9200D. Being English I do usually call this an overlocker but the American name "serger" is shorter and I thought it worked better in this case.

This one didn't come with a cover so I had great fun working out a pattern for such an odd shape. I'm really pleased with how it turned out though.


The only problem is that after all that work I guess I'm going to have to stick with these machines. Hubby will be pleased to read this!


I also made a few really useful accessories. The mug caddy is from a pattern by Simplicity (2450). I'll do a separate post on that sometime as I also made Hubby one for Christmas for his desk at work. The thread catcher bowl is from Debbie Shore's Half Yard Home book and the wrist pin cushion is based on one I found here. I didn't have any flowers so I used a circle of fabric instead, it's not as pretty but I was impatient. 

I guess I'd better go and finish my Clarity samples. Happy crafting.

Lynne
x


Monday, 25 January 2016

Going Tartan for Robert Burns

As it's Robert Burns' birthday today I thought that I'd go a bit tartan. It was a name I dreaded at school due to Tam O' Shanter which we studied in English Lit (not one of my favourite subjects). However, in recent years I've discovered Burns Night in the Mess and he's suddenly become a whole lot more interesting!


I was so pleased with my first Bobbi Bow Clutch (blogged here) that I decided to make a tartan one for Burns Night. I wore and old black dress (nobody ever remembers them) and for less than £5 (the cost of the fabric including postage!) I had a nice new look. 


As I had ample fabric I even used it for the lining and I still have some left. I love the fact that I can just make something like this so cheaply and quickly.

My blog is mainly about cards though so I thought I'd see if I had a tartan one of those to share too.

'

 I made this 5 years ago for a Scottish friend. The lettering was done with my Cricut and the reflection with a brayer (they're so much easier now we have the Gelli Plate).

Stamps Used

Happy crafting and if you're going to a Burns Night have fun!

Lynne
x

Friday, 8 January 2016

Janet Clare's Artisan Apron

Good evening. I may not have got any Christmas cards made but I did make a few presents.


One of them is this apron that I made for my mum; I thought it was such a clever design when I saw it on TV. Mum wanted a new one with "Cute animals on it" so I thought I'd make it for her.

I found the perfect fabric in a local shop - Fletchers Fabric in York. It's lined with cream cotton lawn also from there.


Here's Mum modelling the back. It's great that there's no ties to worry about - you just pop it over your head. It was quite amusing watching her put it on for the first time though!

As it's quite a busy fabric I thought I'd do a spot of pattern matching on the pockets (I didn't worry about the back).


It takes a bit more effort but I think it was well worth it.

To do it I traced the pocket pattern piece onto a sheet of vellum (it's more substantial than tissue and I have lots in my crafty stash) and positioned it where it would go on the apron, matching up the notches. I then marked where the animals were using a pencil.


Next I matched up those pencil lines to the fabric and cut the pocket out. 


By turning it over I was able to use the same piece of vellum for both sides .


Lovely job! I think I'm going to have to make myself one too. A Labrador one would be fun.

Lynne
x

Saturday, 1 August 2015

1920s Fancy Dress

Hello everyone. I'm sorry that it's been so long since my last post but I don't have any cards to share at the moment. Unfortunately there won't be a Claritystamp show on Create and Craft tomorrow so it might be September before I have any more cards to blog. I thought I'd come on and say hello though and share some sewing I've been working on. I'm afraid it's a bit of a long post but you have got a month to read it!

Since rediscovering sewing I've learnt quite a few things. One of them is that although I'm only 5'3" I'm not petite - I just have short arms and legs on a pretty normal length body! I also have a bigger bust than most patterns are designed for. This is how I discovered Colette Patterns as they are designed for a C cup, which I am in sewing terms (this doesn't relate to your bra size but the difference between your upper bust and full bust). Luckily my measurements perfectly correspond with their (US) size 6 so I figured that should make my life a bit easier!

The first thing I made was their Sorbetto top which is a free download. I've now made three of them as I was pleased with how it turned out. So when I found out our Summer Ball would have a 1920s theme I thought their Laurel dress would be perfect to work with.

I made a toile to start off with and realised that I needed to make some alterations as it was a bit looser than I wanted it. I started off with the 6 and graded it down to a 2 below the bust. I also took ½" out of each side of the back seam.  A lot of this was probably due to the fabric not being ideal but I love the pattern and couldn't resist it! I was able to slip it on over my head so I omitted the zip.


This is me badly modelling it in the garden this morning as I didn't get any decent photos of it at the do.

The dress ended up a bit longer than I intended, as I when I chose the length I was going to attach the fringe with the bottom of it level with the bottom of the dress. In the end I decided it looked better lower down and I didn't want to do the hem again!

The fringe is 6" long and was originally looped at the bottom but I cut them off as I knew I'd get caught on something!


So I stuck it to my cutting mat, following one of the lines to keep it level, then tipped it up to get them to hang straight.......


...............before carefully laying it back down and trimming it with my 6" x 24" ruler and rotary cutter. No more annoying loops.


The bag was designed to fit my big and beautiful iPhone 6 Plus as so many of my evening bags are too small for it. The bow pattern is from (and the rest is inspired by) Making Vintage Bags - A gorgeous book by Emma Brennan. It originally had the same length trim on it as the dress but after some feedback from my FB friends I trimmed it down to 4½". Much better!

The overarm strap was really comfortable and very handy for eating and drinking. I'll definitely be making some more for other evening dresses.


Hubby looked fab in his pinstripe suit and I made him a matching tie and pocket square. The tie was a free pattern by Sweet Shop Sewing on Craftsy. It was a really easy pattern but it made a lovely tie. It was also a good conversation starter as people noticed that we matched and commented, Hubby then said that I made it all and I got lots of lovely compliments which was really nice after all that work.

I'll leave you with a few photos of the Mess as they did such a fab job of decorating it and getting everyone in the mood. It was probably the best function we've had here.


The beautiful lady silhouettes were everywhere and looked very Clarity to me.


They would make fab stamps or stencils!


Lots of lovely food and drink. Nom, nom!


Cheese and cocktails - What more could a girl want?

Maybe some crafty goodies. If you fancy a spot of Clarity shopping, this week (1st - 7th Aug) is Groovi Week on their website. If you spend £40 on Groovi products you get a free Christmas Tree Groovi Plate.


Groovi baby! Not entirely sure what I was doing there!

Lynne
x

Friday, 22 May 2015

Sewing Machine Cover

Hello everyone. Hubby eventually got home two hours after his chips were ready, so they were stone cold but with a spot of mayo on they weren't too bad. Luckily I'd made them with fresh unpeeled potatoes - I don't think cold frozen chips would have been as edible.

As I mentioned in my last post, this is what I've really been wanting to make........


..........a pretty cover for my sewing machine.


As it came with this really naff plastic thing.

I found this great video on YouTube by TheCraftyGemini and based it on that.


I used the plastic cover to help work out the size of it and the shape of the end sections. Then made a pattern out of some card.


The fabric is from the Sew Simple range by Makower. It really brightens up my craft room.


The handle and double button idea come from Debbie Shore's Half Yard Heaven book. I added the same fusible fleece to this that I used for the cover as it gives it a bit of body.


I also added a white polycotton lining.


I couldn't resist adding a yo-yo to finish it off. This time it's made with my new Jumbo Clover Yo-yo maker. I did ask Hubby if he'd like some yo-yos on his uniform but he didn't seem too keen!

I'm so chuffed with it - it's so much prettier than that horrible plastic thing and I made it myself! I think my Janome will be very snuggly under it. It won't be on for long though. I just found out that this year's Summer Ball is going to have a 1920's theme and I've ordered a pattern to make a flapper dress. Let's hope that goes as smoothly!

Before I go, do you remember the idea I had when writing my last post about my boring sign?


Well, I did that this morning. It's possibly a bit busy but much prettier. I just hope those birds don't poo on the laundry!

I hope you have good Bank Holiday weekend. My next post will be another first - I finally have my folded book finished.

Lynne
x

Wednesday, 20 May 2015

Peg Bag

Hi everyone. I'm afraid I haven't got any cards to blog at the moment, so I thought I'd share one of my sewing projects.....


.....a peg bag. Apologies to anyone who's already seen it on FB but I wanted to put it on here too.

I've been watching all of the sewing shows on Create and Craft recently and was dying to have a go at one of Debbie Shore's bags.


When I saw this gorgeous fabric from the Washday range by Makower I thought - peg bag! Its not a traditional shape but it holds loads of pegs and was a great project to practise a few techniques on - I didn't have to worry about it fitting and it didn't matter if it wasn't perfect (the pegs won't complain!).

I originally intended to use the peg fabric for the body of the bag but when I put the fabrics together I thought it looked better with the darker, iron fabric there. I used my own measurements but basically followed Debbie Shore's Reversible Bag video on YouTube (it's also in her Half Yard Home book). I did add some fusible fleece to the outer part of my bag and the handles as this was one of the things I wanted to try. My bag didn't need to be reversible so I just used a plain cream cotton for the bottom section of the inside. The rest of it is made with two fat quarters, one in each pattern.


A yo-yo finishes it off. I've recently bought some Clover yo-yo makers and they make this job so much easier. I do love a gadget!


It now hangs in my utility room looking pretty. I think I might have to get some more fabric to put behind my vinyl laundry sign (made with my Cameo). It's over 40cm wide so my decorative papers weren't big enough. Actually, the bird fabric that I shared on here recently would look pretty. I wonder if I will have enough left over when I've made the bias tape that I need to finish the top?

I was really pleased with my bag turned out and making it gave me the confidence to tackle my next project -  a cover for my sewing machine. I'll be back with that next time. Meanwhile I'm back in card making mode as I have Clarity samples to make. Exciting!

I hope Hubby gets home soon. I cooked chips in my Actifry an hour and a half ago and I don't think they'll be that edible now. Luckily they were to accompany quiche and salad so that's still OK. Cold chips anyone?

Lynne
x

Monday, 13 April 2015

Hanging Heart and Packaging - Part 2

Hi everyone. Where the previous post was about the Hanging Heart itself, today's is about the packaging I made for it.


It started off as a plain white bag that I bought in Hobbycraft. I chose some card to match the heart and just had fun with it.


I used the packaging stencil to decorate the back.


Filling it up with some DVDs made it easier to do this. I taped off the parts of the stencil that I wasn't going to use and sponged black Stazon Ink through the stencil; I cleaned this off with surgical spirit afterwards.

Then for the fun part - I've always loved stitching on cards but I could never get the tension correct for it on my old machine and so it always looked a mess. My shiny new machine is a totally different beast so I thought I'd give it another go. I swapped the needle over (I'll keep one just for card) and was so thrilled that it worked perfectly.


I used a dotty embossing folder to make the pink card match the spotty fabric heart and then stuck it to some black card and embellished it. My personalised stamp is stamped onto card cut out with a Spellbinders Decorative Labels Eight die. I added a bit of shading to it and added some more butterflies with the extra one that comes with the main stamp. It's such a cute little stamp in its own right.

I zigzagged around the pink card with black thread, then went around the black with cream thread. I also went across the lace where it's above the cream card to make it more secure. A ribbon and a couple of small pink hearts completed this part.


To finish it off I stamped the tissue paper with my personalised stamp in Jet Black Archival ink. If I was doing it for my own use I would use second generation ink for this, as I think it looks nicer, but for TV I went for first so it would stand out well.

Stamps and Stencil Used

Lynne
x
Related Posts Plugin for WordPress, Blogger...