Monday 29 September 2014

Christmas Log Cabin

Morning all. It's hard to believe that it's nearly October, before we know it it might be looking like the scene in my card. Brrrrrr!

Speaking of October, there's still a couple of days left (until 8pm on 30th Sept) to enter this month's Nature challenge on the Claritystamp Challenge blog.  There's a £50 Claritystamp voucher (chosen at random) for the winner so it's well worth having a go.


There's not much to explain about this card really. The snow, sky and some of the trees are stamped in Weathered Wood Distress Ink. The cabin roof is covered with Glamour Dust to give it a bit of sparkle and the star is heat embossed with a gold glittery powder for a bit more bling.

That was short! I'm going back up to my craft room now to finish off my samples for next Sunday's TV show. I'll be back on Wednesday with my card for the next challenge on the Claritystamp Challenge Blog - it's a silly one! My card that is, not the challenge.  :)

Stamps Used

Lynne
x

Saturday 27 September 2014

The Holly and The Ivy

Hi everyone. Sorry that it's been ages since my last post but it's been one of those weeks! I hope yours has been better.

I finally started work on next month's Clarity samples yesterday though so that has got me going again. One set in particular is a lot of fun to work with and I look forward to doing more with them over the weekend.


I think this is my favourite from my last lot of German samples.


I started off by stamping the Frohe Weihnachten banner in black Archival. I then masked that off so that I could stamp the Holly and Ivy. It's then coloured in with Spectrum Noir pencils. The holly berries are coloured with a red Sakura Glaze pen and some Distress Ink finishes it off. As you can see, I kept the banner masked when I did that so that it stands out more.

The background was done in the same way.

I'd best get on now - lots to do! I hope you have a lovely weekend.

Stamps and Stencils Used

Lynne
x


Saturday 20 September 2014

Stille Nacht - Silent Night

Yay! It's the weekend! I hope you've got something nice planned. I was hoping for some happy post but it didn't arrive, so I've had a bit of a clear out in my craft and utility rooms. Not very exciting but productive.


Today I thought I'd share my Stille Nacht card and how I made it.


The first thing I did was ink through the Curly Strip stencil so that I knew where to position everything. I then stamped the trees in black Archival (first and second generation), added a moon and masked off the music so that I could brayer in the sky. This was done in Denim and Black Adirondack ink.


When I was happy with the scene I put the stencil back in place and applied Forest Green Sparkle Medium. I think it makes an unusual, blingy base for the trees and I do like a bit of bling at Christmas.

Stamps and Stencil Used

Lynne
x

Thursday 18 September 2014

Frohe Weihnachten

Morning all. I was going to write this post yesterday but Dee Paramour wrote on FB about organising her Clarity stamps and I got sidetracked - It gave me the kick up the bum to do mine and I unmounted all my mounted ones. It wasn't a fun job but I'm so pleased I did it. I've gone from 4 boxes full to less than one (I guess that should be two really if you include one for the handles).

Talking of the handles, I didn't realise how many different sizes there were - I have 12 different ones! The handles are fab but they do take up a lot of storage space when the stamps are on them. When they're not they all nest together. Now I have the best of both worlds - I can mount the stamps when I'm using them and then unmount them and store them neatly away afterwards.

Anyway, as I mentioned in my last post, I have my German samples to blog. That means that my Crafty Little Blog is going Christmassy for a bit.


This one uses the Dove Window stencil with Sweet Dimensions Gold Paste by Sweet Poppy and it gave me a lot of trouble! The paste is quite runny and when I was spreading it through the stencil it kept going under the lines (I must get one of the long Sweet Poppy metal spreaders as they look really good). In the end I got so fed up with it that I mixed a whole pot of gold holographic glitter in to try and thicken it up.


It worked and this is what I ended up with.


I'm afraid that my photographic skills couldn't do it justice but this blurry one shows the sparkle a bit. The banner across the front is also more legible in real life.

Once I was happy with the paste section, I stamped the International Christmas Greetings in Versamark ink and brushed over them with gold Perfect Pearls. I did the same for the banner.

It was still missing something, so I used the stencil to draw around and cut out two doves in pearlescent card. The great thing about stencils is that you can just flip them over to reverse the image.

A mat in the same gold card finishes it off.

Stamps and Stencils Used

Lynne
x

Monday 15 September 2014

The Great Outdoors

Hi everyone. I hope you had a good weekend. I had a fab time yesterday at the Claritystamp Open Day in Colburn (near Catterick Garrison). It was lovely to catch up with old friends and meet new ones. Barbara, Dee, Maria, Paul, Mandy, Jo and Sam did a fab job on the demos. I came way really inspired and have already had a play with shaving foam and Alcohol Inks this morning (thanks for the tips Dee). I bought some new goodies including the supplies needed for the hand-painted vase project in this month's New Design Stamp Club project sheet. Maria was demonstrating that technique and her samples were gorgeous. A couple of crafty friends there (you know who you are!) treated themselves to the full set of re-inkers but I was good and just bought a few to try................although if I like them I'm sure I will be adding to my collection. After all I do have all of the ink pads and I'm sure will need re-inking one day.

The venue was perfect and we were looked after so well by the Clarity team (as well as the demonstrators there was Dave, Heather, Len, Elaine and Chloe (apologies if I've forgotten anyone)) and the people from the church (loved the lunch). That reminds me of one thing I am trying to forget - Jim and his video camera. I could barely say what my name was, let alone anything sensible! Basically, everyone worked so hard to make it a success and it certainly was. Barbara said she will be doing it all again next year so I will look forward to that.

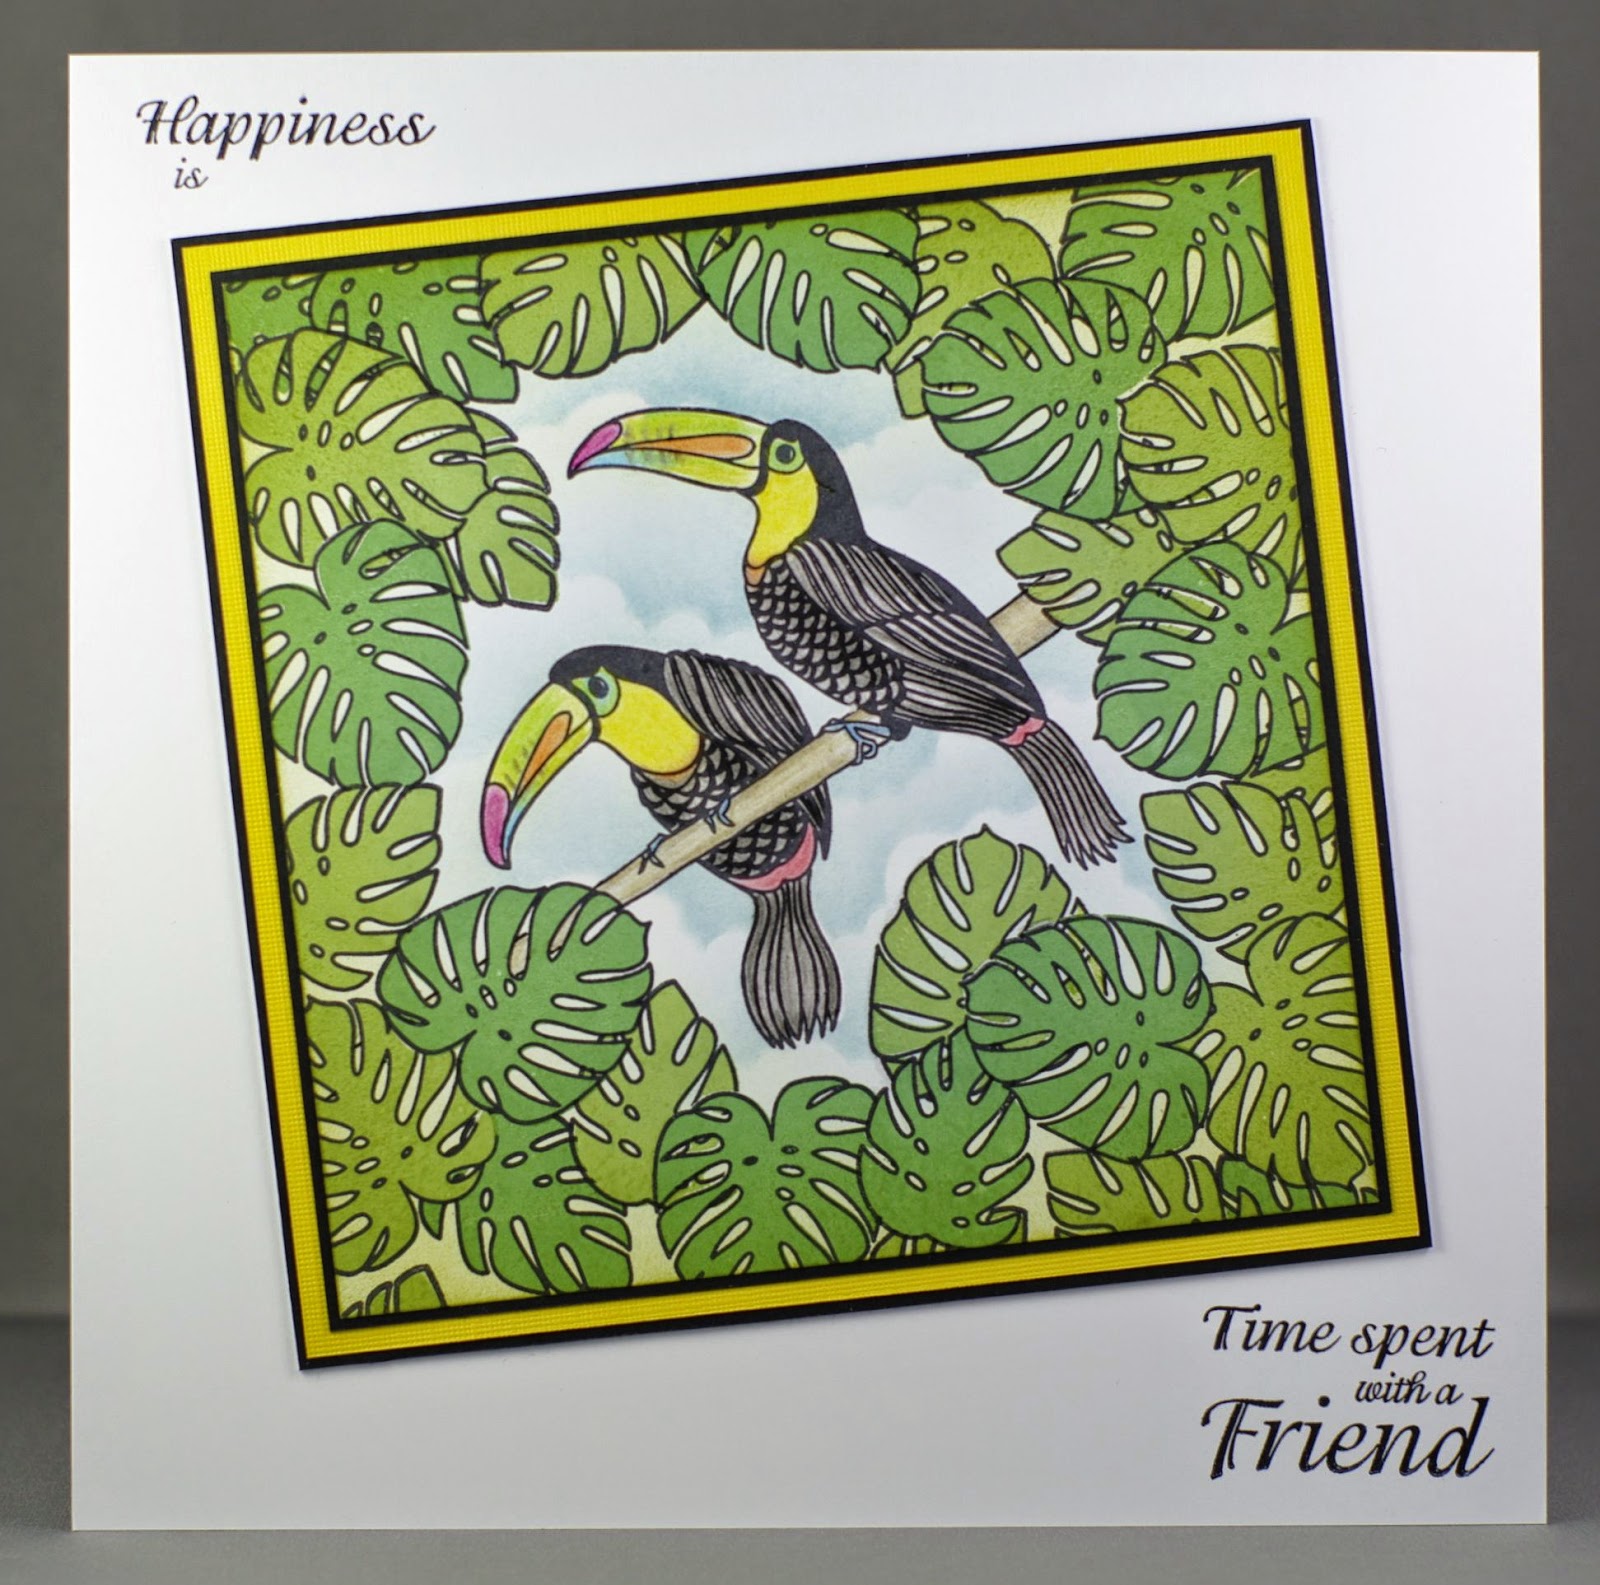
Before I go, here's my last card from this month's Claritystamp show.


I do love the great outdoors, so I particularly love the words from this set and I can see myself using them a lot.

I started off my Gelli print with a layer of Buff Titanium acrylic paint. Then I masked off the area where I wanted the Mountain Range stamp to be and did the Treescape print on top.

The Mountain Range is stamped in Archival black and some colour has been added with Spectrum Noir pencils.

The Great Outdoors and Woodland Animals were stamped and clear embossed to make them stand out more.

I'll be back soon with my samples from the last German show.

Stamps and Stencil Used

Lynne
x

Friday 12 September 2014

Four Seasons Trees

I've always loved doing seasonal cards and the Bird Tree stencil seemed perfect for one.


The left side of the tree, with the birds flying away, reminded me of leaves and snowflakes, so I made that side autumn and winter. The right, solid side then became blossom for spring and leaves for summer.

It took me a while to figure out how to achieve this but in the end I had the idea of embossing the tree with clear powder. This meant that I didn't have to worry about either masking off the intricate tree to work on the background or the colour of the scenery behind showing through if I didn't.


The first thing I did was to run the card and stencil through my eBosser to emboss it. I then added colour to the tree with various inks on a make-up sponge (a piece of copy paper masked off the side I wasn't working on). When I was happy with the colour I pressed Versamark ink through the stencil to coat the whole tree. I covered that with clear powder and heat embossed it.

Then it was just a case of filling in the scene to give the look of each season. I wanted the focus to be on the tree so I kept it pretty simple.

Autumn and Spring

Winter and Summer
Before I go, have you got your tickets for the Claritystamp Open Day in Colburn (near Catterick Garrison) this weekend? If you haven't you can still go as they will be selling them on the door. Details can be found here. I'm excited as I've got mine. I was meant to be going with fellow DT members Janet Pring and Kirsty Goodwill but sadly Janet has had to cancel (we'll miss you Janet) so it's just Kirsty and me now. It will be fun to catch up with the rest of the DT, watch their demos and meet Facebook friends old and new. 

Stamps and Stencil Used
Labrador from Remountable Home Set

Lynne
x


Tuesday 9 September 2014

Toucans - Happiness is Time Spent with a Friend

I thought I'd start with this card.........


...........as the stamps really made me smile when they arrived.

When we got married, just over 25 years ago, Hubby was posted in Germany and I joined him over there. We didn't have a lot and started off with a furnished Army quarter, then gradually bought our own furniture.

My father-in-law reading while I'm being a domestic goddess

One of my favourite things was these fab toucan sofas (we also had matching dining chairs) and the Clarity toucans took me right back there. Happy times!

Anyway, back to the stamps.


I started off by stamping the toucans in Archival black on a square piece of card. I then filled in the area around them with the cheese plant leaves. Masking some of them off so that it looked like they were in front of the ones I stamped on top.

I used Archival black for the outline of the leaves and Cottage Ivy and Bamboo Leaves Memento for the solid part. One thing I have found out before is that I find it much easier to stamp the outline first and then fill it in with the solid stamp. When I do it the other way around I never seem to be able to line them up as accurately. I noticed that on TV Barbara did it the other way around, so I'd suggest having a play on some scrap paper and see if it makes a difference which way you do it - It could just be one of my peculiarities!


Once the leaves were all done, I brushed some green ink around the edge and masked off the birds to work on the clouds behind them.


The toucans are coloured in with Spectrum Noir pencils and I chose black and yellow mats to complement them.

The "Happiness is time spent with a friend" stamp seemed the perfect finishing touch.

Stamps Used

Lynne
x

Sunday 7 September 2014

September's Claritystamp Samples

What a great show today with three fab new kits and the return of some others.


These are the four cards that I made with the new kits. As always, I will also be blogging them all individually throughout the month. I still have last month's German samples to blog too.

There were also quite a few cards shown that I'd made previously, so I thought I'd add them too. If you click on any of the photos below it will take you to the original post on that card.


Happy crafting,

Lynne
x

Saturday 6 September 2014

O Little Town of Bethlehem

Hi everyone. I thought I'd better get my final card blogged from last month's Create and Craft show, before Barbara is on again tomorrow (the month has gone so quickly!).


This card uses stamps from three different kits plus a stencil but I thought they all went well together.

I started off by inking through the Olive Branch stencil with a couple of different greens. It makes a great frame for the Stampstamps which I then stamped inside. They were then filled in with the Nativity Scene stamps.


I wanted the carol to have some dimension so I stamped it twice - the first is stamped directly on the card, then the second is just the banner part which is cut out, shaped and stuck it on top with Pinflair glue gel.

The Stampstamp Corner, a Christmas greeting and a matching green mat finish it off.

Don't forget - Barbara Gray will be on Create and Craft TV tomorrow (Sunday 7th Sept) at 9am for Stamping with Clarity. I can't wait!

Stamps and Stencil Used

Lynne
x

Monday 1 September 2014

Butterfly Box Frame

Morning all. It's the first of the month again, so it's time for a new challenge on the Claritystamp Challenge Blog. Congratulations to the winner and top 5 of last month's "Feminine" challenge. It was lovely to see so many different takes on the theme.

This month's challenge is "Nature".


This is my project.


Beautiful Clarity butterflies..........


..........stamped onto 200gsm paper/card with their wings cut out.............


.............and framed in an Ikea Ribba box frame.

I started off by stamping the butterflies and verse onto the paper. I then coloured the butterflies in with my Spectrum Noir pencils, choosing colours to match the paper.

Then came the fun part - the cutting out! I used my trusty Fiskars FingerTip knife on a glass cutting mat and took my time. Luckily I managed this without chopping off any vital parts (butterfly or human).

I then folded up the butterflies' wings and matted it up so that the patterned paper showed through the from below.

The patterned paper has a bit of a vintage look to it and the white card looked a bit stark against it so I  went over the white with Old Paper Distress Ink on a Clarity Stencil Brush to tone it down a bit.

Three sparkly brads finish it off. 

There are so many beautiful nature themed Clarity stamps and stencils to chose from that I think that this is going to be a popular challenge. I look forward to seeing all of the entries. Have fun!

Stamps Used
Small butterfly from the Remountable Best of the Classroom Set

Lynne
x


Related Posts Plugin for WordPress, Blogger...