Sunday 29 December 2013

Hubby's Birthday Card

I can't believe this is my last post of 2013. Thank you to everyone who has visited my blog this year, I hope you've enjoyed it.

I wonder what new Clarity stamps and things I will be blogging about next year?

As I mentioned in my last post, I really enjoy Barbara Gray's lessons. As well as watching the ones on TV I also have all of her DVDs.


When I saw this project on the new one I knew it would be perfect for my diving mad hubby.

I was so pleased with how it turned out. I did have a bit of a problem colouring the fish though as I only had a couple of Distress Markers but I've since bought some more. The next ones will be more colourful!

Well, I guess that's it for 2013. I hope you'll join me on New Year's Day when I'll be sharing my next project for the Claritystamp Challenge Blog.

DVD Used

Lynne
x

Friday 27 December 2013

Family Christmas Cards

I hope you all had a lovely Christmas, we did. After all that work, it's over so quickly though but before I move on to other things I have three final Christmas cards to share with you.

I love designing my own cards but I also love doing the In The Classroom with Barbara Gray lessons. It's nice just to have the fun of making something without having to think about the design.


When I saw Barbara make this card with the Lesson 20 Jigsaw Set I thought it would be perfect for our parents' cards. 

If you would like to have a go Barbara has a picture tutorial here on her blog. It's a fun one to make. I personalised mine by adding the text.


Mum also loves her crafting and this is the card she made for us. 


Maya wasn't forgotten. She got one too.

My Card - Stamps and Stencils Used 
Winter Wonderland Set - Lesson 14
Jigsaw Kit - Lesson 20

Lynne
x

Tuesday 24 December 2013

Merry Christmas

Well, it's nearly here. There's only one more sleep until Christmas Day. I hope you've got everything done; I just have presents to wrap and mince pies to eat.


I've been saving this ATC for today's post so that I can wish you all a Merry Christmas and a Happy New Year. 

The snowman is made with white Angelina Fibres and his scarf and hat are coloured with ProMarkers. The snow is Shabby White Frantage Embossing Powder.

See you all after Christmas.

Lynne
x

Sunday 22 December 2013

Penguins and Lily-May's First Christmas Card

I do love penguins!


I had a toy one as a kid and he went everywhere with me.

Now, as an adult, I can't resist a cute penguin stamp. Last year it was the Hobby Art Christmas Penguins and this year I just had to have Archie & Pals (also by Hobby Art).


I used it with the Claritystamp Letter Box stamps to make this card for my great-niece. I hope she will like them too.

A while ago I shamefully admitted that I'd bought a couple of cards but they were so cute I couldn't resist them. I have a M&S calendar in my craft room that has the most adorable little felted creatures on and I spotted that they had Christmas cards in the same design. One of them was perfect for my hubby...........


......but it had this on it.


That's nothing a crafter can't fix though and I soon had it looking like this.


Before I go I thought I'd share this too. I had a go at recreating the first photo yesterday (getting on for 40 years later). We haven't aged a bit!  

Lynne
x


Friday 20 December 2013

My 2013 Christmas Card - Maya The Chocolate Nosed Reindeer

Here it is..........


..........my 2013 Christmas card starring Maya. It may not be a stamping masterpiece but they were all made with love.

I took the photo way back in January when we had snow. I'd struggled to get last year's cards done and I thought it would a handy back-up plan in case the same thing happened again. I was right, it was! 

We've taken so many photos like this that we now have it down to a fine art - Hubby holds the treat and I snap away, quickly! These antlers are quite good though as they are actually for dogs and have an elasticated band to keep them on. They were bought in the Accessorize sale. I bought a little elf hat style one in Strikes Garden Centre for this year so maybe I should get some photos taken ready for next year's card!


I printed a load of the photos out and matted them onto brown card to match Maya. I then went through my scrapbook papers picking out all of the Christmassy red and green ones to give the background some variation. Then it was just a case of sticking them all together and stamping the greeting. So I suppose there was some stamping involved........

I hope they made people smile.

Lynne
x


Wednesday 18 December 2013

Christmas Postage Stamp Cards

If you read my blog regularly you probably know that I was struggling to find the time and enthusiasm to make my personal Christmas cards. I had the best of intentions but other things kept getting in the way.

In the end I thought that I'd create a few variations of one card and set up my own little production line.


The basic idea was to have the Winterland stamp, that I spoke about in my previous post, as the background, with different stamps (deer, snowman, dog etc.) in the foreground. This was the first one that I made using the Kids and Sledge stamp.


I then made this one for my sister-in-law as she loves her horses.

Then I realised that they weren't quite as quick and simple as I thought (even getting the postage stamp straight and central had a big potential of going wrong) and they were abandoned.

Next time I'll show you what took their place. It involves Maya, as most things do! 

Forgive me crafters, but I may have bought a couple as well.

Stamps Used

Round Christmas greeting is by Lili of the Valley

Lynne
x


Monday 16 December 2013

Christmas Winterland Bunnies

Things are finally coming along nicely here crafty-wise. My Christmas cards have all been handed out or posted, I've made my first two samples for January's Clarity shows, my next project for the Claritystamp Challenge Blog and I'm about to share with you my final card from December's shows.


It features the Large Winterland stamp and the cute little bunnies (love them!). The Winterland stamp is such useful stamp to have. It makes a beautiful, instant background that you can change the look of depending on what you put in front of it.


It's a really simple one to make - I stamped the scene and "Happy Christmas", then masked them off with Post-its so that I could stencil over them. The Clarity stencil brushes are perfect for this.

Some Glamour Dust on the roofs and trees finish it off.

If you like the Winterland stamp make sure you come back on Wednesday as my next post will be about my personal Christmas cards and feature it. More about that then though.

Stamps and Stencils Used

Lynne
x

Sunday 15 December 2013

Stained Glass Effect Tile

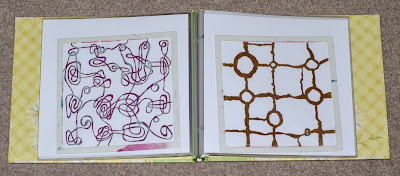
When I saw the Flowers Stencil I thought it looked like a piece of stained glass and I wondered how I could recreate that effect. I don't have any glass paints so I had to improvise.


I used the stencil and my Cameo to cut the black outline out of some vinyl but you could draw around it and colour it in.

Once I had that in place I coloured it in with ProMarkers. I did this on rough paper first to make sure that I had all of the stalks, leaves and flowers correct. I thought I'd found them all but looking at it now I can see a tiny bit that I've missed. Can you spot it?

When I was happy with the colouring I went over all of the sections with Glossy Accents. My hand was shaking from squeezing the bottle by the time I'd finished but was worth it as it gives it the look of glass. 

I don't believe it! I've just spotted another bit - I've missed a whole leaf out too. I was really pleased with it until I started writing this!!!!!  Oh well, it's too late to change it now.

Stencil Used

To top it all I've just been upstairs and found my rough work - I had them coloured in on that. What am I like?

A rather annoyed with herself Lynne 
x

Friday 13 December 2013

Madeleine Gelli Print

This is my Madeleine Gelli print card. I do love black and pink together.


It's a very simple one - I created a vibrant pink Gelli print for the background and then used black acrylic paint to add her on top. 


This was another attempt but I thought there was too much pattern behind her. It looked a bit distracting to me, so I chose the top version where that area is more of a solid colour.


Before I go I thought I'd share this too. I added some Buff Titanium paint to the residue on the Gelli plate at the end of the session. I think it's my favourite Gelli print that I've done, there's just something about it that I really love. Now I just have to figure out what to do with it. Suggestions welcome.  

Stencils Used

Lynne
x

Wednesday 11 December 2013

Lily and her Chrysanthemums

Morning everyone, I thought I'd better get this written before I get struck down with another headache and can't face a computer screen (although the last one might have been self-induced). It's party week here (there are always so many functions on the last week before Christmas) and I'm getting too old for it!


Bringing things back to a more sedate level, here's a lovely serene scene of Lily in her garden. The main image is all one layer so there's lots of masking involved. I cut 4 layers of Post-its in one go for the flowers though so it wasn't too bad.

The pattern on Lily's dress is made by stamping her onto some copy paper and cutting out the part you want to stamp onto. This creates a mask that you can then stamp through. I used the Ornate Corner stamp for this to add the pattern.

Talking of the Christmas parties, I had to share these photos that I took the other night. They made me smile.


I was sat at the table when I recognised something familiar - one of my Christmas cards from last year.........


..........with this written on the back. It had a special message for our table in it. I was really touched that they'd kept it. 

Stamps Used
Chrysanthemums - Large
Trees from Lesson 21 - Remountable Winter Trees Set

Must get on, shopping to do today. 

Lynne
x

Monday 9 December 2013

Santa Stop Here Card

Another Christmassy one today - my "Santa Stop Here Card'.


With the show being at the beginning of December I thought it would be a fun way to use the British Isles stamp.

The British Isles is stamped in black Archival ink to give it a lovely solid colour.

The new shapes for the Letter Box kit were stamped and masked off, along with the moon, before I brayered the sky. The snow is Shabby White Frantage embossing powder sprinkled carefully over and heated.

It was asked where the arrow is pointing to when it was on TV and I can now reveal that the answer is............... nowhere in particular. The curved arrow was cut on my Cameo and my original idea was to point it to where I live in North Yorkshire but in the end I just went for where it looked good!


I should be alright though as I have this little guy in my window. Hopefully Santa will see it.

Stamps Used

Lynne
x

Thursday 5 December 2013

Angelina Fibres Chrysanthemum

I really enjoy reading Barbara Gray's blog every day, although when I read her post "A Stencil Breakthrough" it made me swear somewhat!  Let me explain.....


....... I've recently got quite into film and fibres and when I saw this stencil I thought it would look beautiful done in them. The question was "How?". I didn't think you'd be able to heat the stencil, like you can a stamp, so I tried to figure out how else I could do it.

Eventually I had what I thought was a brilliant idea - I spread out a load of the fibres and with an iron fused them into a sheet. I then ran that through my Grand Calibur with the stencil to emboss it. It looked pretty good but needed more definition, so then came the second part of my great idea - I covered my large Gelli plate with black acrylic paint and Slow Drying Gel Medium and used that to ink up the stencil. I placed that back on top of the embossed sheet of fibres and ran it through my Calibur again to transfer the ink. Bingo!


I was so chuffed with my idea, until a few days later when I read Barbara's blog and found out that you can use heat on the stencils!!!!!!!!!! Cue much swearing and laughing from me. So if you want to know how to do it properly read Barbara's post here.

Stamps and Stencils Used

Lynne
x

Tuesday 3 December 2013

Christmas Greetings From London

Weren't the weekend's shows fab? They always go so quickly though. It's hard to believe that the next time Barbara is on it will be 2014.


This is the first of my samples that were on the shows.


It was inspired by this ATC that I'd made previously.

They were both made in the same way - by masking off the central panel before stamping the border, then colouring them in with ProMarkers.

For the card, the word "London" is made up of letters from the other sentiments in the kit e.g. the "L" and "O" come from the "Love" stamp."

For the ATC I printed out the large "O" on my computer and used the regular Letter Box stamps for the rest.

The flag on the ATC is a little pin badge that I bought on eBay.

You could also use the Welsh and Scottish sets to do something similar.

Stamps Used

Off to walk Maya now. When I come back I am going to start my own Christmas cards!

Lynne
x

Sunday 1 December 2013

Scene Building - An English Country Garden

It's the first of December! That means the start of a new challenge on the Claritystamp Challenge Blog. The theme for this month is classic Clarity - "Scene Building".

Congratulations to the winner and top 5 of this month's "Christmas" Challenge. Quite a few of those featured beautiful scenes. I think it's something that most Clarity fans enjoy and I look forward to seeing what you all create.


This is what I've made. It uses the Cottage Scene Stencil that Barbara used on the lesson show yesterday.

I think that the secret to a good scene lies in the planning and I probably spend as long doing this as I do making it.

The first thing I do is flick though my Claritystamp Catalogue, which contains stamped images of all of the Clarity stamps that I own, and choose which ones I am going to use. The main one I picked here was the Small Swing stamp. I then chose stamps that I thought were the correct scale and would complement it.


I then start stamping them to work out where they're all going to go. This is some of my rough work from this scene (ignore the strange church on its side on the top middle one, I think I was just looking at the difference between first and second generation ink). It also shows the paper I ripped to create the hills.

I initially used the black part of the cottage but then I realised that I didn't I didn't need that for planning, I could just put the stencil on top of the paper (you can see that in the bottom middle image). As you can see I don't worry too much about technique when I'm doing this, it's just about trying to get the composition (especially the perspective) right. Just moving a stamp slightly can make a big difference. 

I made the scene, especially the sky, a lot more vibrant than I normally would as the black is quite stark. The silhouettes are all stamped in black Archival except for the weather vane which is embossed. 

On the previous versions of this, that I blogged last month, I used black acrylic paint and the Gelli plate for the black area. On yesterday's show Barbara used Black Soot Distress Ink and a make-up sponge. For this version though I cut it out of black card with my Silhouette Cameo.


Just for fun I converted the photo into black & white. I quite like that version too.

This is such a versatile stencil as you can theme the scene to suit the recipient. Jackie asked on Facebook yesterday about a golfing scene and I think it would work really well. Where we lived before here was next to a really hilly course and this scene reminds me of it. You could put the horizon a bit lower and add in some more detail in the sky - a sun, some birds, text or even a hot air balloon. The rolling hills could then be transformed into a golf course - you could add a bunker, draw in some flags and the golfer silhouette from the Remountable Sport Set. I hope that helps Jackie. 

Stamps and Stencils Used
Cows and Small Cockerel from the remountable Farm Set
Weather Vane - Lesson 21
Well and Lamp Post from the Remountable Village Set
Labrador from the Remountable Home Set

Lynne
x


Friday 29 November 2013

Storage Idea for Claritystamp Stencils

Just a quickie today but I thought this might be worth sharing.

I only really started my stencil collection when Clarity started making them and I needed somewhere to store them. I haven't got the patience to put them neatly away in their packaging each time so they all got piled up in a 12 x 12 storage box. This was fine when I only had a few but when my collection grew it wasn't so good. They got tangled up and I couldn't easily see what I had. I was thinking it was a shame they wouldn't fit in A4 punch pockets, then I had an idea.


Like most crafters I've lots of things lying around waiting to be used. One of those is scrapbooks (I used to do quite a bit of it but it's been neglected lately) and they are a perfect stencil storage solution. Plus they look pretty in my craft room.


The 9 x 11 inch ones fit in a 12 x 12 album...........


..........and the 7 x 7 inch ones fit in an 8.5 x 8.5 inch one. I think that size is unique to K & Co. who make these albums but an 8 x 8 one would also work.

The smaller 4 x 4 inch ones will fit in a 6 x 6 album. 

I also have spare pages and extender posts so they should keep me going for a while, although my collection is growing quite rapidly..............

It's nearly the weekend so there's only one more sleep until Barbara is on TV (I'm going shopping today so hopefully I will be watching on my new telly) and two until the launch of a new Challenge on the Claritystamp Challenge Blog. Appropriately for this post, my project for this month features one of the Clarity stencils. I hope you'll be back to take a look. If you haven't yet entered this month's challenge you have until 8pm on Saturday to do so. There's a £50 Claritystamp voucher for the winner (chosen at random) so it's well worth entering.  x

Lynne
x

Wednesday 27 November 2013

Woodpecker Gelli Print Card

Yay, my Clarity samples are now in the post ready for this weekend's TV shows so I can relax a bit. It's been such a busy week!

I'm now doing my post-sample making craft room tidy-up. It's a bit more exciting than usual though - we're looking at buying a bigger TV for the living room so the old 32" one will be going in my craft room. Exciting!

The last card I blogged was my Woodpecker Card that was stencilled using just part of the Lone Tree Stencil.


This one uses the whole stencil and the Gelli plate.


The Gelli print was done in the same way as my Gelli Print Country Scene.............


......however this time I covered up the sky so that I had a clean area for inking the clouds. It gives a very different look to it.

I must confess that I did cheat a little with the woodpecker and he was stamped on a separate piece of card and stuck on.

I coloured a piece of card for the border with the same colour red ProMarker that I used on the bird. That way you don't have to worry about matching colours.

Now that my samples are made I really must start on my personal Christmas cards; I still haven't made a single one yet. Don't tell anyone but I was out shopping with my friend Connie yesterday and I was looking at them in the shops. I didn't actually buy any but it might yet come to that (I can't believe I just admitted that).

Lynne goes off to apologise to all of her beautiful Christmas stamps..................

Stamps and Stencils Used
Lesson 22 - Woodpecker Set

Lynne
x

Monday 25 November 2013

Woodpecker Card

This is the first of two cards that I made with the Woodpecker Set from Lesson 22 of In The Classroom With Barbara Gray.


The scene is all one layer so there's lots of masking involved! I didn't have the Clarity Masks when I made it so I had to cut them all out of Post-its by hand - that was fun! I've since bought them though so if I want to do it again it will be a lot easier!!!

The first thing I stamped was the Woodpecker. I masked him off, then used just the trunk part of the Lone Tree stencil as a template to draw around so it looks like he's clinging to it. I coloured it in with ProMarkers and added some green and brown ink with a sea sponge to give it a bit of texture.

I thought the "flowers" were Clematis so I coloured them in accordingly but I think I'm wrong as I noticed that the stamp is called "Leafy Branch". That's the beauty with stamping though, you can colour things in how you like and give them lots of different looks.

Once I'd finished the stamping I masked it all off and stencilled in the brick wall. I used several colours of Distress Ink with the 7 x 7" version for the main image and the 9 x 11" for the background.

Stamps and Stencils Used
Woodpecker Set - Lesson 22

Next time I'll blog the Gelli version.

Lynne
x

Saturday 23 November 2013

Rise and Shine!

Yaaaaay! My Crafty Little Blog has just passed 50,000 page views. Thank you all for reading it, I hope you're enjoying it.

I started this month's Claritystamp samples with my Christmas Countdown Calendar made with the Cottage Scene stencil and I'm finishing with my other design using it.


This one shows a Summer's day. The cows are in the fields and the sun is shining. I've also added the weather vane to this one; it is rather large in proportion to the house but it's great fun and makes a lovely focal point.

The black cottage part is done the same way as the Christmas scene - I used the Gelli Plate and some Daler Rowney System 3 Process Black paint with their Slow Drying Gel. I found the addition of the gel gave me a much blacker print than without it as the paint stayed wetter.

The scene is created with Adirondack ink pads, Ink Dusters and make-up sponges. It's a great one to play with, you can add as much or as little as you want to the scene. I've recently done a much busier version that I will be blogging soon.

Stamps and Stencils Used
Trees from Remountable Winter Trees Set - Lesson 21

Lynne
x

Thursday 21 November 2013

Fuchsia Anniversary Card

Fuchsias are such beautiful flowers and these stamps certainly do them justice.


I started off by using the Fuchsia Border stamp to create the border (isn't it appropraitely named?!) . The size of that set the design for the rest of the card.


I then used the Circle Dots Stencil and a pencil to draw the central circle. This enabled me to see where I needed to stamp the fuchsias. I rubbed out the pencil and masked off the flowers before stencilling the circle. The new Clarity stencil brushes are perfect for this as they give such a lovely soft effect. I also used them on the edge of the design.

As you can see it started off as a one layer card but I thought that there was too much white space. So I used a square Spellbinders die to carefully cut out the centre. I then matted it onto some black card.


Colouring isn't one of my strong points so I thought I'd stick with the stencilling theme and add the colour that way.

I cut myself stencils for all of the different sections out of some Post-it notes and used a dinky little stencil brush that came with a set of chalks to apply the ink.


I was quite pleased with how they turned out.

Stamps and Stencils Used


Lynne
x

Tuesday 19 November 2013

Sunshine and Flowers

There's not much sunshine here at the moment; it's gone decidedly nippy.


Hopefully this card will brighten up the day a little. Although the Sunshine stencil wasn't part of the same kit as the stamps I thought it complemented the verse perfectly.

It doesn't really shows up in the photo but I embossed the sunshine with my Grand Calibur before I applied the colour (don't forget to stamp the verse first as you get a better impression on a smooth surface).


I stamped out the flowers a few times and cut away sections to give them some dimension. They have been stuck on with Pinflair glue gel which adds to this.


Whilst I was watching Barbara demonstrating this set on TV I thought it would be fun to make myself a cappuccino using the same stencil, so I thought I'd share that too. I think I might have to go and make myself another, this blog writing lark is thirsty work!

Stamps and Stencils Used

Lynne
x


Sunday 17 November 2013

Kingfisher Theatre Card

I hope everyone is having a lovely weekend. Mine has been a really lazy one so far but that's all about to change as my next lot of Clarity stamps arrived yesterday. I have done the thinking stage and I must now put my ideas into action - I hope they work!

Talking of Claritystamps, you may have noticed that there's a new button on my side bar. If you click on it it will take you to Barbara Gray's fab blog where she's having a giveaway. There's Claritystamp goodies to be won so it's well worth taking a look. The winner will be drawn at the end of November.


I always enjoy making theatre cards and I though the Kingfisher stamp and Branch stencil would be perfect for it.


They are really easy to make - you just decide what size you want the front (mine is a 17cm square) and add 8cm to one side (so mine are 17cm x 25cm). Score each side at 2cm and 4cm then stick them together with wet glue when you've decorated them (I didn't take photos of this stage so I've just reproduced it with the stencil and white card for the photo).


I cut a replica of the stencil out in brown card using my Silhouette Cameo. Then I cut out an aperture in the card so that you can see through it. I added a little fish in the Kingfisher's mouth and they were coloured in with ProMarkers then stuck behind the branch. To make it more stable I backed the aperture with acetate.

I really liked the background that I'd created on my Kingfisher Gelli Print Card so I did a very similar version on this card. This time I did it with inks, a brayer and Ink Dusters though.

If I'd had the new Reed stamps they would have been perfect for the foreground but unfortunately they didn't arrive until I'd finished the Kingfisher cards. The Bullrushes were a great stand in though.


I do love the dimension that you get with these cards.

Stamps Used
Fish and Boat from the Remountable Harbour Set
Cows from the Remountable Farm Set
Trees from Lesson 21 - Remountable Winter Trees Set

Lynne
x


Related Posts Plugin for WordPress, Blogger...