Friday 31 October 2014

Happy Halloween

Happy Halloween everyone. I've been dressing up poor Maya again!

Too cute to spook!
If you've been reading my blog for a while you'll know that she has quite a few headbands and I just couldn't resist adding this one to the collection.

When I first started, a couple of years ago, it took quite a few bribes and a lot of attempts to get a decent photo. However this time Hubby had the genius idea of using a ball. She LOVES a game of ball and sat there totally fixed on him holding it.........

What are you waiting for? Throw the ball!!!!!
..............even though it was a really windy day and Batty's wings were flapping about all over the place. I never thought a stuffed bat could be more uncooperative/trouble than Maya!

Luckily I got one photo where you could see both wings and Maya was really happy when she got her game of ball.

The frame is a Studio Ilustrado design bought from the Silhouette Store. The bat is from Tesco. Maya is a one off!

I hope you have a spooktacular day. I'll be back tomorrow with a new project for the Claritystamp Challenge Blog. See you then.

Lynne and Maya
x

Monday 27 October 2014

Let Heaven and Nature Sing

Hi all. I hope you're having a better day than I am. It's been one of those days where nothing has gone right. Not good when I'm trying to finish off my Clarity samples! I thought a break might help, so here I am.


This is the last of my cards from this month's shows, although it was actually the first one that I made.

I started off by masking off the moon and brayering the sky with Denim and Black Adirondack ink. When the moon mask was removed I stamped the deer and trees in Archival ink.


The stars are masked off from the top of this nativity stamp. They were stamped in Versamark ink and heat embossed with Star Dust embossing powder to make them twinkle. Unfortunately that doesn't really show up in my photos.


The verse was stamped once in black Archival then again, slightly up and to the right, in Versamark to create a shadow effect. This was then covered with silver detail powder and heat embossed.

I guess I'd better get on. I have dinner to cook and samples to finish. See you later.

Stamps Used

Lynne
x


Wednesday 22 October 2014

With Love

Morning all. I hope you're having a good week. My Claritystamp samples are coming along nicely, so I'm a happy girl.

Today's card was inspired by Wedgwood Jasperware.


It's a very simple design but with such a beautiful stencil that's all you need.


Grunge Paste and Wedgwood Blue coloured card create the look of Jasperware. Then I just cut a mat to match, punched the corners with an old Fiskars heart punch and stamped the sentiment. Simples!

Stamp and Stencil Used

Lynne
x

Sunday 19 October 2014

Foamery

Hi everyone. Oops, I just noticed that it's been a week since I last wrote anything (my blogging mojo seems to have gone AWOL lately). I hope you're all keeping well. I know lots of you are off to the Stamp Magic Show at the Doncaster Dome today so I hope you enjoy it. Hubby is diving today so I'm stuck here without a car and can't go. It's probably just as well though as I have next month's Claritystamp samples to make.

This is another of this month's and explains this post's strange title.


Hubby asked what I was doing when I was making it, so I told him I was making scenery with shaving foam (and ink). He then named it "Foamery" and I thought it suited it.

My idea was to make something a bit more realistic (that's not quite the right word but I can't think of a better one at the moment) than a random shaving foam background i.e. a green grass hill and a blue cloudy sky.

I forgot to take photos of this version but I did take them on my first attempt, so these are what you're seeing next.


The first thing I did was prepare the background card for work on the sky by masking off where I wanted to put the sun and grass.


I then got a layer of shaving foam in a plastic box, added some drops of blue Alcohol Ink and swirled it around with a pokey tool. I did a lot of the swirling horizontally to add to the cloudy effect.


When I pressed the card in I was got this - my cloudy blue sky. I sponged a bright yellow sun into the masked off section I'd left for it.


I then masked off the sky and did the same sort of thing to create the grass. Only this time I used several green inks and a sort of horizontal flicking motion with the pokey tool. I thought this would look like blades of grass but Hubby pointed out that if I'd done it horizontally it would have given the effect of hills. I like my grass though. I dipped it in several times, building up the colour until I was happy with it (I wanted a more solid colour than I did for the sky). I also used some ink on a sponge to create some shadow and depth around the edges.

It's one of those things that turn out different ever time (I prefer the grass in my first attempt, as there is more detail in it, but I like the sky better in today's card), that's part of the fun though.

That's the "Foamery" part explained, now for the rest.

It's all stamped and sponged in Jet Black Archival Ink. If you have a really keen eye you may have spotted that my tree looks a bit different to the stencil..........


.........there was a bit of a gap in the top right hand corner so I added in another bird from the boy stamp.

Stamps and Stencils Used

I'd better go and walk Maya now, then I have the rest of the day to spend in my craft room. See you soon,

Lynne
x


Sunday 12 October 2014

Happily Ever After

Hi everyone. I hope you're having a good weekend. We've just got back from a lovely walk with Maya, so I thought I'd write a quick post while I'm drinking my coffee.


This is the second of my castle cards. The previous one was stamped in Jet Black Archival but I stamped this one in Watering Can. Don't they look different?

I wanted to make my card appear as if you were looking at one castle through the window of another. Some Grunge Paste with the Sun Arch and Brick Wall stencils helped me achieve this.

I started off by stamping the castle and trees and colouring the scene. I forgot to photograph this but I made an aperture using the Sun Arch stencil and copier paper to do the stamping through. That way I didn't have to worry about the Grunge Paste making that difficult.


This was then covered up with a piece of paper the shape of the arch and I applied the Grunge Paste.


When I removed that I had the window effect I was after.

The Grunge Paste is coloured with various Distress Inks on a brush. I then sanded some of the bricks back a bit to distress it further. This was a technique I got from Sam Crowe at Catterick. Thanks Sam.

"Happily Ever After" is stamped onto card cut with a Spellbinders Ribbon Banners die.

That's my coffee finished, I think I might just treat myself to another one. It is Sunday after all.

Stamps and Stencils Used

Lynne
x


Friday 10 October 2014

Schloss Neuschwanstein

The castle stamp is based on Schloss Neuschwanstein (Neuschwanstein Castle) and brought back lots of happy memories of a trip we took to southern Germany. My original idea was to make a postcard but somehow it ended up as a card.


In 2001 we were on our third German posting. Hubby came back from work one day and said that he'd borrowed a friend's tent and we were going away for a few days.


Just over 400 miles later we found this stunning campsite by the Forgensee. It was practically full but we were told that if we could find somewhere to pitch the tent we could stay...........


...........For some reason this spot wasn't taken.

It was my first time camping so it was quite an experience! One of the things we hadn't thought about was our dog, Nana. It got quite chilly at night so she ended up in Hubby's sleeping bag (she was a much more delicate soul than Maya!).


The highlight of the trip was a visit to Schloss Neuschwanstein. It was a really steep walk up but well worth it. It is stunning!

Anyway, enough of my reminiscing. My castle is stamped in Jet Black Archival and coloured in the Spectrum Noir pencils.


I wiped the ink off the bottom of the stamp before stamping it so that it looked like it was nestled in the trees like in this (really bad) photo.

The decorative border is cut with a Martha Stewart punch.

Items Used
A selection of Clarity trees

Lynne
x

Wednesday 8 October 2014

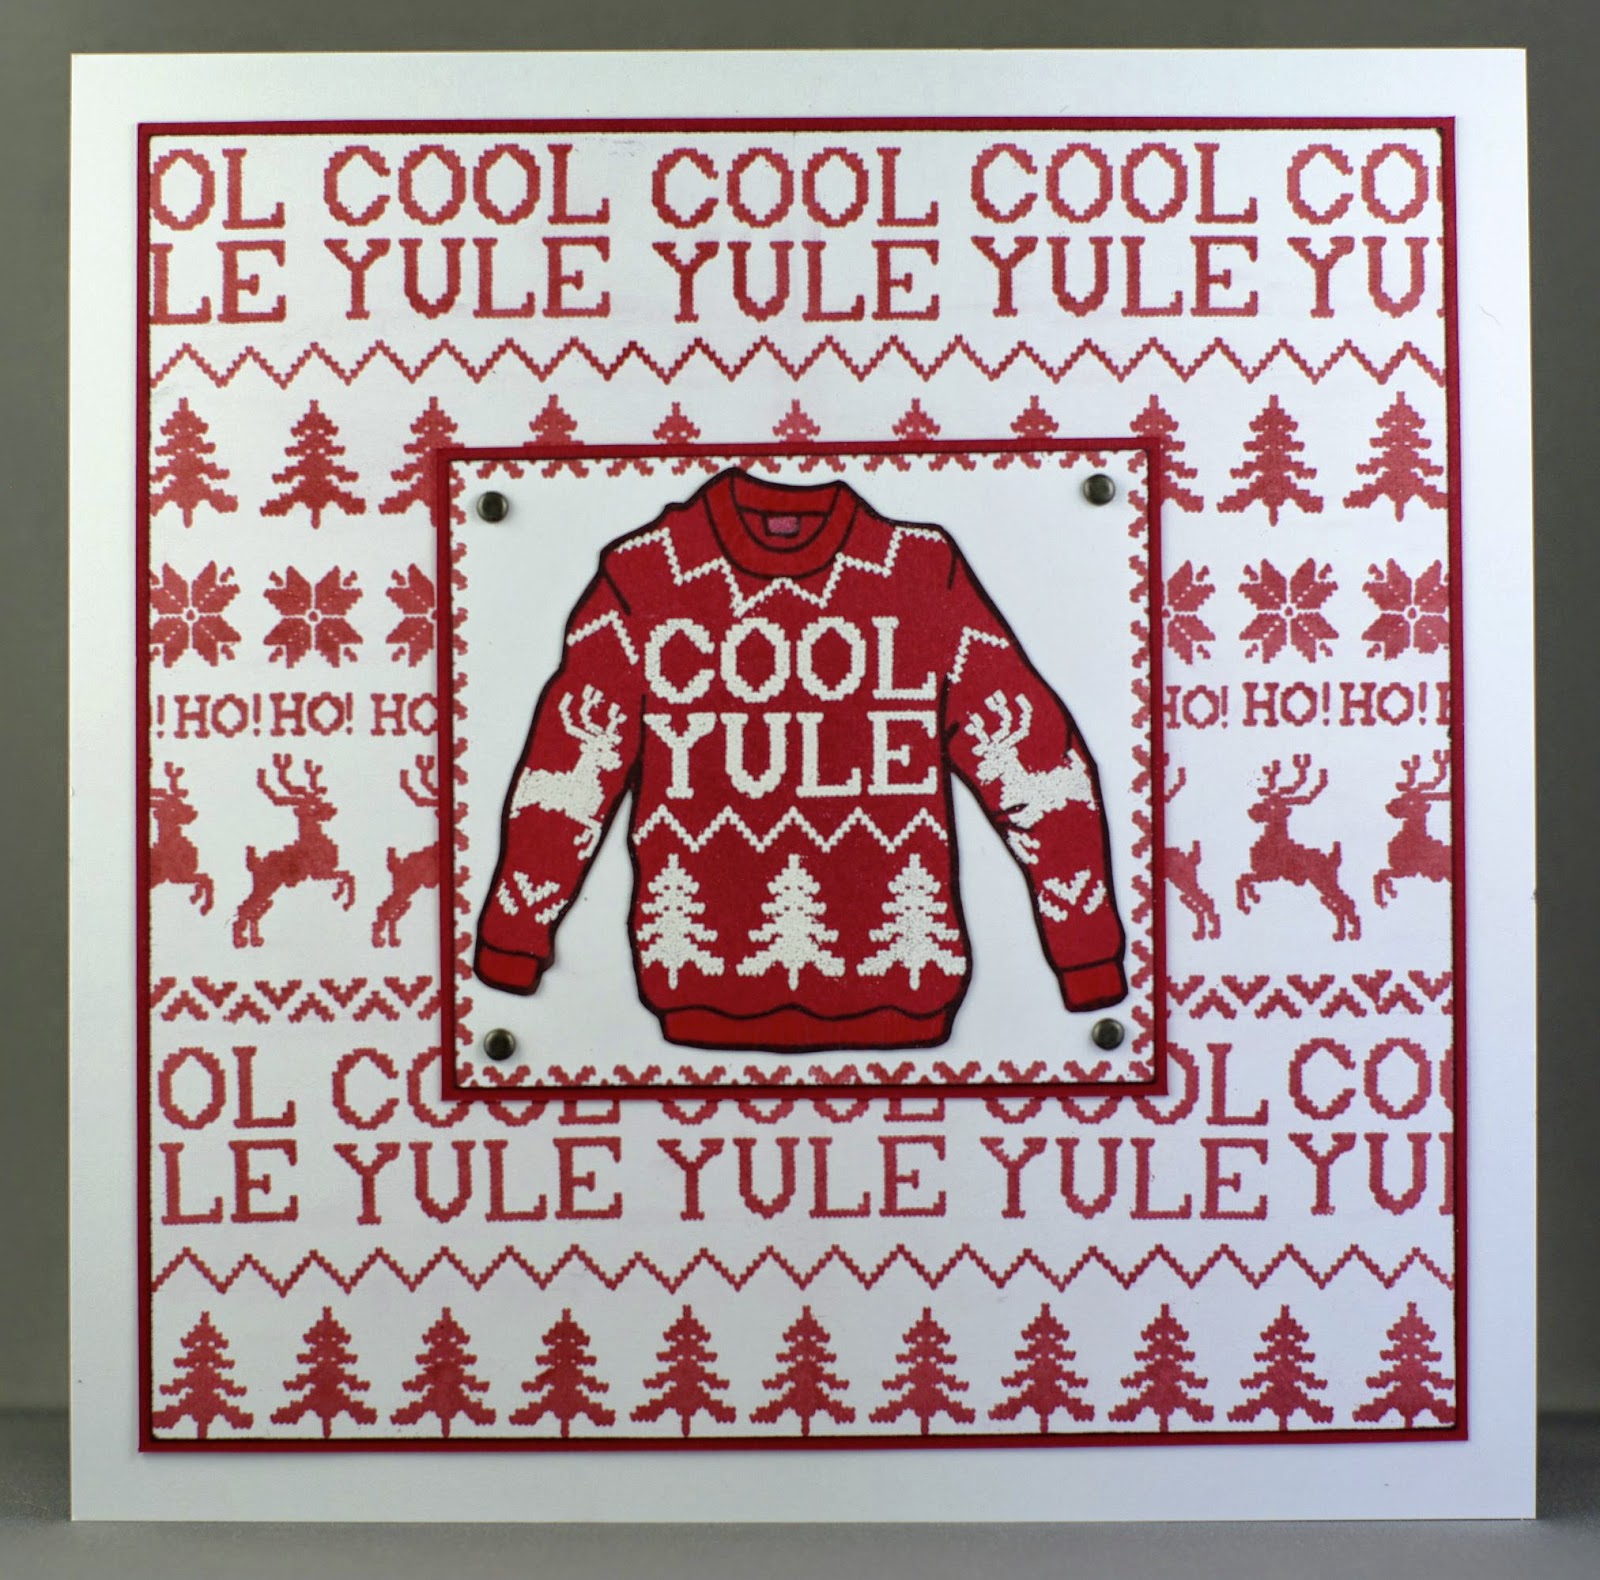
Cool Yule Jumper

Hi everyone. Mum and Dad have just gone home after a week up here. It was great fun and we got to do some crafty things together. We went to the GNPE, Harrogate on Saturday, watched Sunday's Claritystamp show on Create and Craft and made next month's Claritystamp Challenge Blog project (using something I bought at the GNPE).


I thought I'd start with my jumper card from Sunday's show as it was such a fun one to make. I can see that everyone else thought the same as it sold out so quickly. Sazzle's and Kelly's Dave and Barb jumpers did make me smile. I think I might personalise a few for Christmas cards.

I started off by creating the background. This is done with Red Geranium Archival Ink and nearly went horribly wrong!


I started at the bottom with the Christmas trees, then I drew in a pencil line as a guide and stamped the zigzag.


I continued like this until I had covered it all - I was so chuffed that I managed it in one go with no inky fingerprints or smudged bits! Because of this I was extra cautious and heat set it as well as leaving it overnight before I rubbed out the pencil lines.

Fast forward 24 hours and cue lots of very bad words.


Despite my precautions, it was smudging. I couldn't believe it! It was the first time I've used this colour but I've never had a problem with any others. Luckily it wasn't too obvious (just a pale pink glow rather than an obvious red smudge) so I just continued really carefully, cleaning my eraser after every rub. I got there in the end but I won't be doing it in that colour again!


Next up was the jumper. I cut that out of red card and masked off the arms when I was working on the body and vice versa. The stamping was done in Versamark ink and heat embossed with white detail powder. I curved the zigzag stamp for the bit below the neck.

It took a while but I got there in the end.


It made me smile when we were in Marks and Spencer's just after Sunday's show and saw this. Do you think it would suit me?

Stamps Used

Lynne
x

Wednesday 1 October 2014

Dreaming of Summer

Morning all, it's time for a new challenge on the Claritystamp Challenge Blog.


The theme for this month is "The Seasons". As I'd recently made my Four Seasons Tree cards I thought I'd just have a bit of fun with it. My card was inspired by one of my favourite films at the moment, Frozen, in which the snowman dreams of summer (not knowing what would happen to him if he got warm).

I thought that Frosty might have the same dream.


I started off by stamping him and the flowers, then I masked them off and created the scene. The flowers and Frosty's scarf were later coloured in with Spectrum Noir pencils.


I drew the word summer in between the two birds like a banner.

I hope it's made you smile - I had a lot of fun making it.

Congratulations to the winner and top 5 of the "Nature" challenge. I look forward to seeing your seasonal cards.

Stamps Used
Birds and foliage from the Remountable Birdhouse Set
Dream from Word Chain 5

Lynne
x
Related Posts Plugin for WordPress, Blogger...