Showing posts with label Spellbinders Nestabilities. Show all posts

Tuesday, 12 August 2014

Lacy Swallows

Morning all. It's a busy time for Barbara and Claritystamp at the moment. Barbara has already been on HSE 24 for an hour this morning and she has another one later. Then on Thursday she has 5 hours on Create and Craft with a really useful One Day Wonder (love it) and lots of fab Christmas sets. I am so looking forward to watching. That's my Thursday sorted!

As Barbara has so many shows, that also means that the DT have been busy. I have so many cards to choose from I don't know what to blog first!  I have two left from the beginning of the month's show though so I guess I'd better do those first.


The Lacy Swallows are such pretty, girly stamps that I thought I'd go pink (not quite as pink as Jane's hair though!). It's quite a simple one - I stamped everything in black Archival, coloured it in with my Spectrum Noir pencils, masked the birds and hearts off and inked in the sun and sky.

The card mats are cut with Spellbinders Nestabilities - Grand Labels Eleven.

Don't forget to tune in to Create and Craft on Thursday. The One Day Wonder launches at 8am.

Stamps Used
Lynne
x

Saturday, 1 March 2014

Flower Power

It's the first of the month, so that means the start of a new challenge on the Claritystamp Challenge Blog. I always think that these blog challenges are a great excuse to have some fun. You're not making a card for a specific person or occasion, so you can do whatever you like, as long as you stick to the theme.


I certainly did that with this one! You've probably guessed already but the theme is "Flower Power". 

I have a huge stash of patterned papers from when I used to scrapbook and when I saw this month's theme I immediately thought of these papers. The range is called Berry Sweet and was by K & Co. Add to that the fact that I've recently been watching Splash (wasn't Perri Kiely fab!) and that this diving stamp was in the recent New Designs Club members' sale and you end up with a card like this. I am sure that her hat and costume are giving her real flower power!


Other than the lettering, this panel is the only bit of stamping on the card. I stamped the diver first onto an oval cut out with one of my Nestabilities and masked her off to create the background. I chose the colours of this to match the papers. They are Evergreen Bough Distress Ink for the water (I brayered over scrumpled up copy paper first to get the waves) and Wild Honey and Rusty Hinge Distress Ink for the sun. I cut my own stencil for this using a Design bought from the Silhouette Store and my Cameo. It was only when I was uploading my project and saw the beautiful tags by Linda Page that I remembered that I already had a fab Clarity sun stencil. Silly me!

I coloured the diver in with ProMarkers and cut her costume and hat out of the paper with the smallest print.

Then it was just a case of going wild with the rest of the papers, adding some of the matching felt embellishments and assembling it.

I hope she makes an elegant entry into the water, unlike some of the contestants on Splash! 

Congratulations to the winner and Top 5 of the Love and Romance Challenge. It was lovely to look at all of the entries and I hope you will enjoy this challenge as much. The Design Team certainly have; I love all of the beautiful creations that they've made. Don't forget that there's a £50 Claritystamp voucher for the winner.

Stamps Used

Lynne
x


Thursday, 17 October 2013

From Little Acorns.....

What's everyone got planned for today? I hope it's something nice. I've had a few days off from crafting and plan to get back to it today. Next month's samples won't make themselves!


This one was Hubby's favourite from this month, as he kept telling me at every available opportunity! You may be thinking "Isn't that lovely" but this is why.................


......I'd been sat in my craft room all afternoon planning some cards and was particularly pleased with this one, especially the idea of using one of the framer stamps with a large "O" to make the word "Oak". Hubby comes in from work and I proudly show it to him. He looked at it and said "Or you could say from little acorns".

After a bit of thought I grudgingly had to admit his idea was better than mine (Ooh it's so hard to type that!) and went with his version. However, as I keep reminding him, he wouldn't have thought of that if he hadn't seen mine first!!!!!!!!!!!!! Those of you who are FB friends with me will probably have an idea of what we're like and know that this could go on for some time......................

Anyway, back to the card which is what you're really interested in.

As you can see from my plan I used a couple of Spellbinders dies - Labels Five and Grand Labels Eleven to cut out the shapes, then I used my Cameo to cut out the mats and base card.

You may have noticed that the tree looks slightly different in the finished card. Well Hubby also pointed out that the trunk didn't look very oak-like, so I used the top and mantle of the smaller tree in the set with the trunk of the largest one.

The solid stamp in the set is used to colour in the oak leaves. I first inked it up with Adirondack Lettuce, then added some Meadow around the edge. This gave them a lovely vibrant green colour which I thought was a nice change form the autumnal colours I usually use.

Before I go, if you fancy a bit more Clarity, Barbara Gray now has her own blog. You can find it here.

Happy stamping.

Stamps Used
Noel Frame (although you can use any of the "O" framers)

Lynne
x

Saturday, 7 September 2013

Shades of Autumn Card

I always think of autumn when I see leaf stamps and I wanted to capture the fabulous autumnal colours in this card.

It's certainly starting to feel like it's here now. Brrrrrr!


I actually made the background for another topper but when I'd finished it I didn't like them together. Plus there was so much work in making it that I wanted it to be the focal point.


I stamped the solid leaves all over in various autumnal colours (for this part I didn't worry if the stamps overlapped). Then I went over them all with the outline stamp. I stamped the darkest leaves first and then masked them off to stamp the ones that would appear underneath them. I used second generation ink for that.

I then brushed Old Paper Distress Ink all over to take away the whiteness.


I made a simple little scene on a Spellbinders Floral Oval to complement the background. The mat for it is cut on my Cameo.

A tag, cut in half (Spellbinders Fancy Tags 2), some bakers twine, and a verse finish it off.

Stamps Used
Lesson 2 Set - Split Tree

Lynne
x

Wednesday, 17 July 2013

I Saw Three Ships Christmas Card

It feels just as odd blogging about Christmas cards in this heat as it did making them!

I love the Spellbinders 2011 Heirloom Ornament dies and thought the Three Ships stamps would work well with them.


It was a bit of a tight squeeze for the smallest ship but there's a ornament to fit them all.

It's one of those cards that's really simple but there's quite a bit of work involved in making it.

I stamped the images on each die cut then added the blue Distress Ink with an Ink Duster. The thin black mats are cut on my Silhouette Cameo.

The white background card was embossed with a Danity Dots Spellbinders Grand M-Bossibilities folder. The dotty theme was continued with the ribbon which I attached with red liner tape.

I'd love a paddle in that sea right now.

Stamps Used

Lynne
x

Monday, 15 July 2013

Holly Christmas Card

As soon as I saw the Holly Sprig stamps I thought they would make fab swags with the little bows from the Remountable Corners and Flourishes Set.


The base card is cut with a Spellbinders Grand Labels Eleven die. To give it a vintage look I brushed the edges of the cream card with some Tea Dye Distress Ink.  

I used the flatter of the two holly stamps to go around the base card and the more curved one to make the swags. The holly is stamped in Olympia Green Versafine and the bows and berries are coloured in with a red Sakura Glaze pen. This gives them a lovely sheen.


I used foam pads on the music to really make it stand out.

It's a very simple card but it was one of my favourites from this month. I hope you like it too.

Stamps Used

Lynne
x

Sunday, 7 July 2013

July's Clarity Samples


Here are my cards from this month's Stamping with Clarity shows.

There was a bit of a Christmas theme this month, although I did rebel slightly and made the Pear Tree into a cheesy anniversary card.

I've called the Holly Tree one my "English Christmas Card" as there is no snow on it!

My Gelli Plate was used on 4 of them.  I do love playing with it and I'm getting more adventurous with it. Hopefully a bit better too.

I love the Spellbinders Heirloom Ornament Dies and thought they were perfect for the 3 Ships and Verse.

That's a little taster of them. As always, I will be blogging them all individually throughout the month. I will also have some cards to share from Maria Simms' Clarity Take 2 show that is scheduled for the 16th July.

Lynne
x


Saturday, 1 June 2013

Civil Partnership Card

It's the first of the month, so that means the start of a new challenge on the Clarity Stamp Challenge Blog.  The theme for June is "Mr & Mrs" which can include weddings and anniversaries.


I've gone for "Mr & Mr" and made a civil partnership card.

I wanted to it to be masculine, so I've chosen a black and white colour scheme and kept the design really simple with minimal embellishments. The white card is all Centura Pearl Snow White. It has a lovely sheen to it that doesn't really show up in my photo. I think it works especially well with embossing folders. The one I've used here is a Spellbinders Grand M-Bossibilities - Garden Lattice.

Mr & Mr is cut out on my Silhouette Cameo from "Cha Cha swirl" letters by Samantha Walker. These were purchased from the Silhouette Store.

"On Your Special Day" is heat embossed in black onto card cut with a Spellbinders Floral Ovals die. A thin black mat was cut with my Cameo and it was stuck on with Pinflair glue gel to raise it from the surface.

Douglas was stamped twice to make the grooms. They are coloured in with ProMarkers and stuck on with foam pads.

I'd originally ordered some wide black ribbon for this card but when I was putting Hubby's washing away I spotted his bow ties! Unfortunately he wasn't quite as excited by my crafty idea as I was, so I had to buy one. You can get them really cheaply though, this one was £3.20 from Amazon but I also got one for £1.59 on eBay and that included P&P! When you think about how much some embellishments can be I didn't think that was too bad. The band is stuck on with Red Liner Tape and I added some Pinflair to secure the bow as it is quite weighty.

Well that's my take on the theme, I look forward to seeing what everybody else comes up with. Don't forget there's a £50 Claritystamp voucher for the winner (chosen at random).

Stamps Used

Lynne
x


Wednesday, 29 May 2013

Gilded Hummingbirds Card

I can't believe we're nearly in June and I'm sat here in a thick fleece thinking about turning the heating back on.....again. It's so different to the lovely weather we had for the Bank Holiday weekend. Talking of June, if you haven't entered this month's challenge on the Clarity Stamp Challenge Blog you have until 8pm on Friday 31st May to have a go. It's well worth it as there's a £50 Claritystamp voucher for the winner, who is chosen at random. On Saturday there will be a new challenge and I will be sharing  the card I've made for that with you. Barbara Gray will be on Create and Craft so it should be a good weekend and if the weather is like this staying in crafting might be a good idea.

Meanwhile, this is another of my samples for the German shows.


It uses Barbara's technique of stamping onto a sheet of double sided adhesive and adhering gilding flakes and mica powders to it. I used gilding flakes for the background and birds, and Perfect Pearls for the moons. It's cut out with a Spellbinders Nestabilities die - Labels Eight. That is matted onto black card cut with Decorative Labels Eight.

The Leafy Columns are stamped in Versamark and heat embossed with black detail powder.

The card is made out of Centura Pearl card which gives it a lovely shimmer.

Stamps Used

Lynne
x


Tuesday, 7 May 2013

Flamingo Anniversary Card

It was a busy weekend for Barbara Gray on Create and Craft with lots of kits selling out. I'm not surprised though as I really loved all of this month's stamps.

Reading the feedback I've had, my two flamingo cards seem to be the favourites of my samples. I must admit they were mine too; I was really pleased with how they turned out. So I thought I'd start with one of those.


I've seen cards where two flamingos make a heart before and was pleased to see that the Clarity one works for this technique. It was perfect as I also had a Happy Anniversary stamp to use.


As Barbara demonstrated on TV, I used my Splodge mat to create the bird on the right. I used Adirondack black ink and stamped directly onto the Splodge mat so that I could then transfer the image to my sheet of Theuva card. I then stamped the bird on the left next to it using the second generation of ink. I've added this close-up photo as I was really impressed at how similar the stamped images are in colour using this technique.

I coloured them in with ProMarkers and cut the oval out with a Grand Scalloped Oval Spellbinders Nestabilitie before adding some Antique Linen Distress Ink. I used my Silhouette Cameo to make the thin black mat for it and the border that the ribbon is threaded through. The pink heart paper is from the Smitten Range by K & Co.

Stamps Used

Lynne
x


Wednesday, 1 May 2013

It's All In The Sentiment - Mother's Day Cards

It's time for another challenge over at the Clarity Stamp Challenge Blog. This month's theme is "It's all in the Sentiment".

I have two cards to show you which I made for Mother's Day this year.


This first one I made for my Mum. The heart and the embellishments were from a K & Co. Smitten kit. I bought it years ago but as it was a Valentine photo card kit I never used it. I couldn't really see Hubby appreciating it! Anyway, this year I realised it would make a fab Mother's Day card so I set about transforming it. 

Instead of a photo I used the "To the World" Clarity stamp. As the challenge says, "It's all in the sentiment" and that one was perfect.

I changed the Valentine's Day embellishment to Happy Mother's Day which I had printed out on my computer.


I had some 12x12 papers in the same Smitten design so I used them to make a similar card for my Mother-in-law.

The sentiment is stamped onto one of the Spellbinders Floral Ovals Nestabilities. Then I've used various other dies to decorate the card. I had a bit of a problem with the edging as I just couldn't get it to cut through the patterned paper and the card I'd stuck it to. Luckily I had some old Fiskars punches in a similar sized heart and circle, so I finished it off with those.

Stamp Used

Dies Used
Spellbinders Floral Ovals
Spellbinders Classic Petal Edgeabilities
Spellbinders Grand Nestabilities Labels 11
Flower - Tim Holtz Tattered Florals
Scroll - Tim Holtz Elegant Flourishes

Embossing Folder
Cuttlebug Wicker Weave


Clarity have so many lovely sentiment stamps, sometimes they are all you need to make a beautiful, heartfelt card. It's all in the sentiment after all.

Congratulations to the winner and Top 5 of the "In the Garden" challenge. I really enjoyed looking at all of the entries and I look forward to seeing what you come up with for this challenge. Good luck!

Lynne
x

Saturday, 13 April 2013

Shrink Plastic Shells Card


As I mentioned in my previous post, I loved the Single Shell done in shrink plastic. After making them for an embellishment on my Shells On The Beach card I wanted to do another where they were the focal point.


The background scene is done on Snow White Centura Pearl card just like the other card, but this time I added the Reeds stamp from the Lesson 16 Windmill Kit. It reminds me of the Marram Grass you get in the dunes at Old Hunstanton.

The oval die cut is from Spellbinders Floral Ovals set. Mum and Dad bought me this for Christmas and at the moment it's my favourite set. I cut this on Centura Pearl card, stamped the sentiment in Coffee Archival ink and then stuck the shrink plastic shells on with Glossy Accents.

Stamps Used

Lynne
x

Wednesday, 13 March 2013

Lily

 Lily is another of the new Clarity lady stamps.


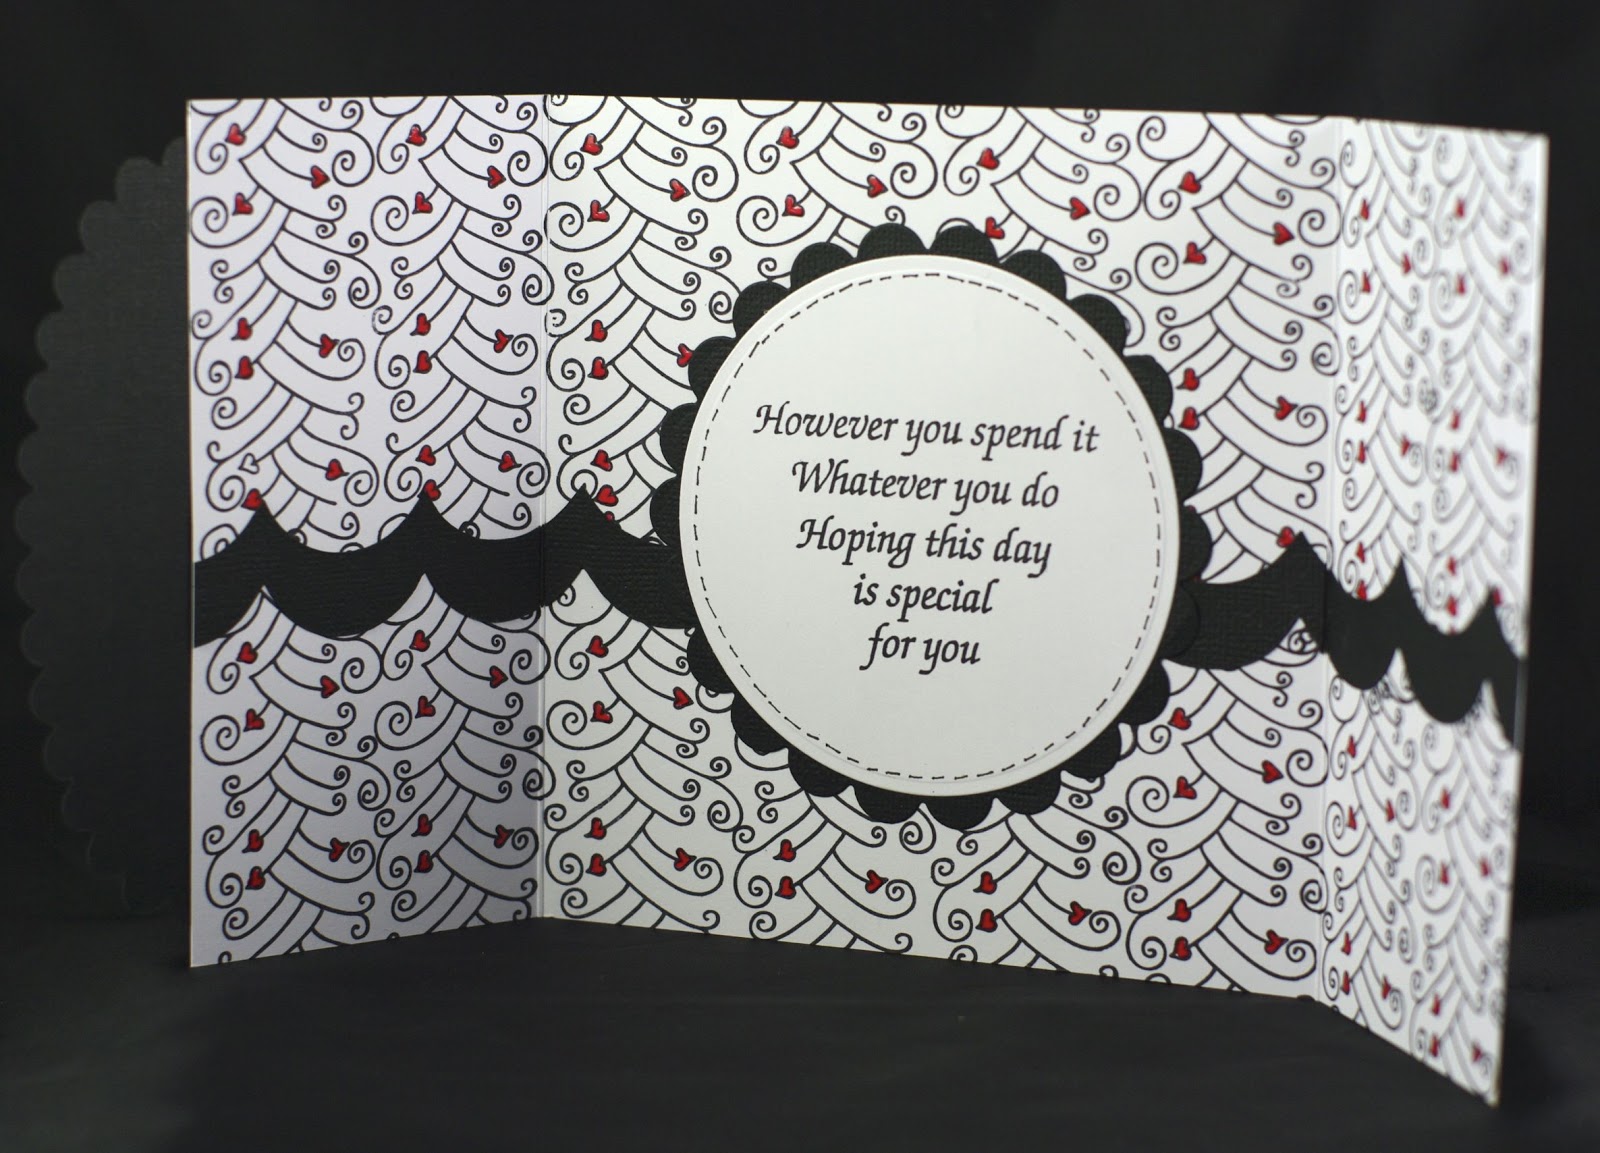
Like the others, she has large open areas on her clothes that you can add your own design to. I wanted to do something different for each of them so I decided to colour Lily in with my ProMarkers and stamp a section of her dress with the background stamp.

The Heart Weave stamp creates a lovely background. The hearts are coloured in with a red Sakura Glaze pen to add a bit of colour. I do love black, white, and red together.


I used a gatefold card so that I could continue the design inside. The strip that runs across the card is cut with my Cameo. The oval and circle mats are cut with Spellbinders Nestabilities.

Stamps Used

It's nearly time for the one I've really been looking forward to sharing with you. If you're a dog lover you might enjoy my next post. Maya hopes you'll come back to see what she's been up to.  :)

Lynne
x

Saturday, 9 March 2013

Annabel

Clarity recently brought out three new lady stamps drawn by Barbara Gray. They have quite a bit of open space on their dresses so they're really versatile; you can colour them, paper piece them, Zentangle them, or fill them in with the matching pattern stamp.


For this first one, Annabel, I chose paper piecing (cutting out different areas of the stamped image in different patterned papers). The paper I used is Picnic in the Park by Serif. It was a 6x6" pad that was free with a magazine. I chose them as the pattern is quite small and I really like the strawberry paper.

I covered the front with some of the green paper and then stamped the Curly Curve along the edge so that I could cut away the excess to reveal the paper than I had stuck inside. I coloured in parts of it to match the papers.


The papers also influenced my decision to give her funky red hair.

I finished it off with a flower and a verse.

Dies/Shapes Used
Oval - Spellbinders Petite Ovals
 Scalloped oval cut on my Cameo
Foliage - Spellbinders Foliage
Flower - Cut on my Cameo

Stamps Used
No Matter Verse

Lynne
x

Monday, 11 February 2013

Rose and Scroll Card


This is another of my samples from the Rose set. The card blank is made with the largest die in the Spellbinders Grand Nestabilities Labels 11 set. I cut that out of some brown 12x12 card and then cut another for the front in some cream card.

I stamped the ink bottle first with an Espresso Adirondack ink pad (this is used for all of the stamping), then built up the scroll around it. As I had to extend it slightly to fit everything in I photocopied it to make a mask. Once I had that I stamped the roses so that they looked like they were behind the scroll. Some of the roses were also masked where they overlapped.

The roses and background were coloured in with ProMarkers.  Budding Rose, Dusky Rose, and Antique Pink for the roses and Tan for the background. I added some Antique Paper Distress Ink with an Ink Duster to give a slightly aged look, especially to the scroll.

The rose embellishment is made with cream Shrink Plastic and coloured with the same colours. I went quite lightly with them as the colour does intensify when you shrink it.

Glossy Accents were added to the ink bottle to give it the look of glass.

Stamps Used
Pen, Ink Bottle, and Scroll stamps from the Remountable Artist Set

Lynne
x

Saturday, 29 December 2012

Spellbinders Bauble Card

Now I could say that I'm sharing this card to encourage you all to start early for Christmas 2013, but I'd be lying! It was one I made for the German shows and didn't get it blogged before Christmas.

I hope you all had a good Christmas. It was a strange one here, hubby and I are still suffering with our colds but somehow Mum and Dad, who were here for a week, managed to avoid catching it. We probably weren't the best company but it was nice to be together. Mum and I spent Boxing Day and the 27th working on the samples for January's shows and I've been finishing them off today. They are a bit of a family affair as I even had hubby doing some drawing on one card for me today. Apparently that's the best bit! :-)


This is an 8x8 card made with a Spellbinders Grand M-Bossibilities folder and Heirloom Ornament (2011) die. The stamps are by Clarity


I stamped the star in purple first, then went over it with Versamark and Stardust embossing powder to make it sparkle.

I had originally intended for the bauble to hang loose in the frame I cut on my Cameo, but as it was for a sample I was worried about it falling off. In the photo it looks like the bauble has a purple mat around it but it is in fact acetate. It's like the filling in a sandwich, holding it all together.


I put a sheet of purple card on the back so that it shows through the acetate from the front. 

Lynne
x


Sunday, 18 November 2012

Baby's 1st Christmas Bauble


This was another of my ideas for the number stamps from Lesson 13. It also uses the letters from the previous lesson.

The bauble was cut on my Cameo from Centura Pearl Card. I inked it with Dusty Concord Distress Ink on my Splodgemat.  The bauble top was cut in gold Mirri card (that hasn't photographed very well).

The baby in the crib is part of one of the 'Twas the Night stamps. I first saw this done by another member of the Design Team, Janet Pring (thanks Janet). It's great to be able to get more use out of a Christmas stamp. It's stamped on a Nestabilities and mounted onto foam pads to give it a more 3D effect.

The reverse is done the same so it doesn't matter if it turns around.

Lynne
x


Sunday, 28 October 2012

Clarity Meadow Dance Poppy Card

This is the last of my cards from October's Claritystamp shows on Create and Craft.  It's also my favourite.


It combines two of my favourite Clarity stamps - Meadow Dance and the Poppies.

I started off by cutting an oval on my Cameo.  Then I stamped the poppies into place to create the foreground.  I masked off a couple of the poppies next to the girl with a ball, so that the Meadow Dance stamp would appear behind them.  It looked a bit odd though as the stamp ended suddenly.  I thought it would be a nightmare to mask them all off, so I finished the image off with a black pen.  I just varied the height of my colouring so that it looked like the stamp continued right across.

I really like the contrast of bright red poppies and mat with the bright yellow of the sun and the black silhouette stamp.  They're so appropriate for this time of year too.

Now I'm looking forward to November's shows that are on Create and Craft TV next weekend.  I've just about finished my cards and today's task is to photograph them all.  That's always a bit of a challenge!

I still have the cards that I made for the German shows to share too, so they will be appearing soon.

Lynne
x

Thursday, 18 October 2012

'Twas the Night Before Christmas Clarity Stamps - Rooftop


Here it is, the last one of my 'Twas the Night Before Christmas cards, Rooftop.  I decided to extend the stamp so that it looked like the roof continued off the Nestabilities.


A simple stepper card was perfect for this idea.  These are easily made on a Hougie board.  


I created a snowy woodland scene for the background.  I stamped the trees, then brayered the sky in Denim Adirondack.  The sky was spritzed with water to give a snowy effect, before I added the snowflakes.  They are also by Clarity. The snowflakes and the snowy parts are stamped in Versmark, then heat embossed with White Twinkle Wow! powder.  The moon is coloured in with a Versamark pen, then heat embossed with Stardust powder by Stampendous.  They look quite similar in the photo but in real life you can see the difference.


Both me and my craft room were a right glittery mess by the time I'd finished!

Lynne
x

Monday, 10 September 2012

'Twas the Night Before Christmas Clarity Stamps - Window


This is the first round card that I've made and I really like the look of it.  I cut the folded base card with my Grand Nestabilities and then layered another on top so you get a completely round card.  I made sure that I got the scallops positioned correctly so it stands up without wobbling.

I've recently learnt how to scan my Nestabilities into my Cameo and cut out a slightly larger mat.  I did this for the black layers on the scallop and banner.  It's so much easier than drawing around them and cutting them out by hand.

I used one of my favourite techniques of stamping a circular border.  The poem mentions "Eight tiny reindeer" so I originally tried it with a reindeer stamped eight times.  It was a bit large and overpowered the main image though.  The little Santa in his sleigh stamp looked much nicer.   Unfortunately that means that there are 16 reindeer, but the thought was there!  :-)

Related Posts Plugin for WordPress, Blogger...