Sunday, 23 September 2012

PanPastel Anniversary Card

This is the last of my cards from September's Claritystamps shows on Create and Craft. It is using the Letter Box kit that is going to be used on Lesson 12 of In the Classroom with Barbara Gray on the 13th October.


I was very excited when this kit arrived and couldn't wait to get creating with it. As it looked like Scrabble tiles I thought I'd have a go at a Scrabble style card. I got out a pen and paper to try and come up with a nice board.  After a couple of attempts I'd realised that Happy Anniversary worked well, then it was just a case of adding in a couple more words. Darling and Husband fitted and that led to the male, sporty theme. It's a good job it's not for my Husband, he can be a darling but he's not really into sport!

For the background I used just two colours of PanPastels, Phthalo Blue, and Diarylide Yellow.  The stamps are all by Clarity and are inked with Versamark.  I just kept adding stamps and layers of PanPastels until I got a look I was happy with.

The letter tiles are all mounted on foam pads to give it a bit of dimension.

I'm looking forward to the lesson and seeing what the rest of the Design Team have created. I've also made a couple more items that I will be blogging after the show. They are great stamps to work with.

Tuesday, 18 September 2012

Noel the Snowman

I was looking at the Clarity Noel stamp and trying to think of something different to do with it.  Suddenly I thought the O looked like a big fat snowman's tummy - I do love snowmen and can never resist a cute snowman stamp!  It took a bit of working out, but this is what I ended up with.


I created a smaller version of the O for his head and cut the accessories on my Cameo.  Noel soon turned into a snowman!

The snowflake and mini snowman stamp are also from Clarity.  The snowflake border punch is a Martha Stewart one.

The way the temperature has been dropping lately it might not be long before I'm making snowmen in the garden!!!!!!

Saturday, 15 September 2012

40th Birthday Card - Male

I had such a lovely response to this card on FB yesterday that I thought I'd blog it today.  It's for Hubby's boss so I wanted to see what people thought of it before I give it to him at his party tonight.  Thankfully it went down really well.


These Clarity balloon stamps are perfect for men's cards, especially if you don't know what their hobbies are.

I started by printing the words on my computer.  I used copier paper to check the positioning and when I was happy with it I printed it onto card.  I masked off the middle section and then the fun began!

I stamped the balloons into position first.  As I was going to decoupage them the only bit I masked was the basket on the largest balloon.  I later coloured that in with a ProMarker.  Out came my trusty Splodge Away mat and I then brayered the hills using a torn paper mask.  Before I took that away I added a bit more colour to the top with a makeup sponge.  My cloud template is still going strong, so I got that and an Ink Duster out to do the clouds. I then just needed to add the trees and the background was finished.  I love it when it all goes smoothly!


I think you can see in the photo, but the balloons have been shaped to give them a more realistic look.


I did this on a soft mat using a large ball tool that I bought in a cake decorating shop.  To give you an idea of size, that is the middle sized balloon next to it.   If you haven't got a mat it could also be done in the palm of your hand.

Once the balloons were shaped I filled them up with Pinflair glue gel, so they will keep their shape, and stuck them on the card. 

Friday, 14 September 2012

PanPastel Christmas Card

Well, I'm getting through my cards from September's Create and Craft shows.  After this one there are only two more to show you.  Just as well that I now have next month's to work on.  As Barbara has already mentioned it on TV, I think I'm safe to say that they include the next three 'Twas the Night stamps.  I have a few ideas floating around in my head for them - I just need to get stamping.

Anyway, back to this month's.


I loved the effect that I created on my first PanPastel card and thought it would make a beautiful background for the Noel stamp.

I started off by making a mask of the O and placing it on some white card.  I stamped all the little miniatures in Versamark ink, then I sponged over them with Permanent Red, Phthalo Blue, and Diarylide Yellow PanPastels.  I then removed the mask and carefully stamped the Noel making sure it lined up with the white area.  The star was originally stamped in black but it looked a bit boring, so I went over it with some sparkly embossing powder.

I haven't started them yet, but I think this could be one of my Christmas card designs for this year.  I love the bright colours.

Wednesday, 12 September 2012

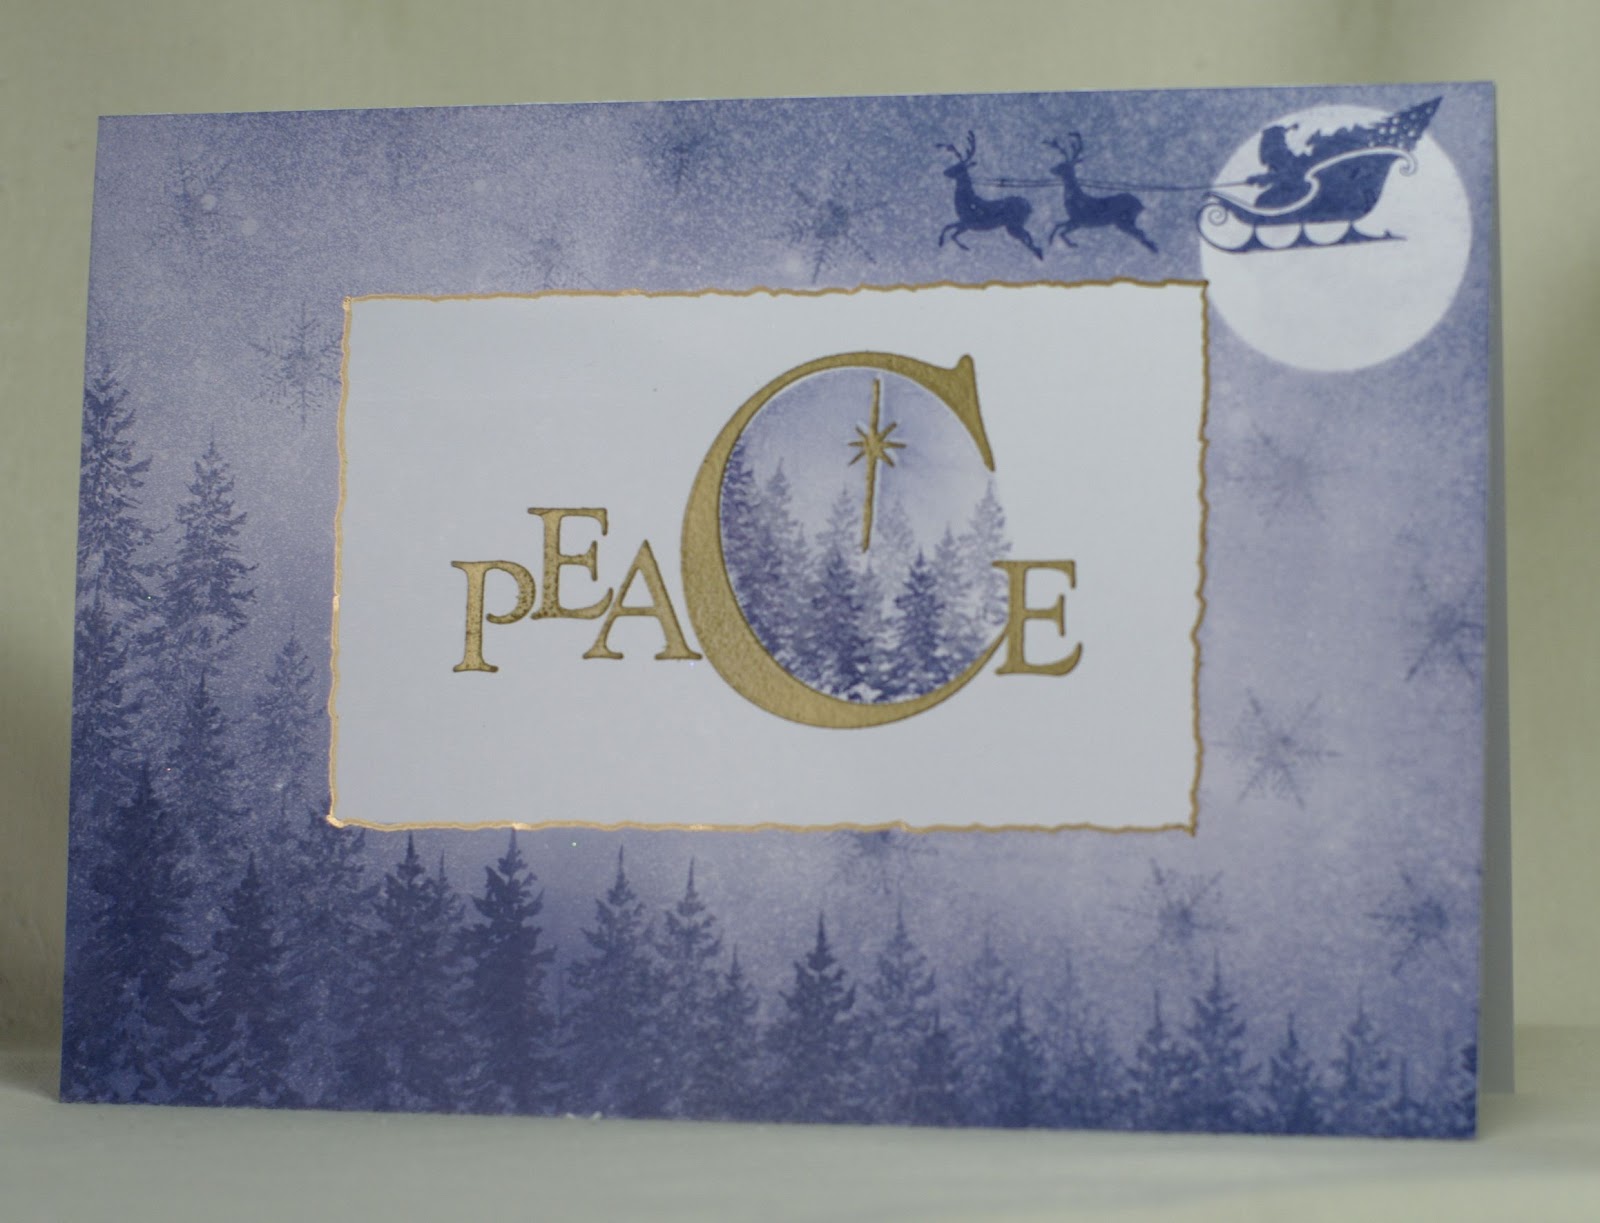
Peace


This is made with Centura Pearl card.  It has a lovely sheen to it and looks beautiful embossed.

I made a mask of the Peace stamp.  I cut it slightly bigger than the image, so that it left a border when I stamped over it.  The Clarity Dove Panel stamp is the perfect companion for it.  I used it for the background and stamped a single dove onto Angelina Fibres to put in the C.


This one is made with an Adirondack ink pad in Eggplant.  I brayered the background, then spritzed it with water to enhance the snowy effect.

Monday, 10 September 2012

'Twas the Night Before Christmas Clarity Stamps - Window


This is the first round card that I've made and I really like the look of it.  I cut the folded base card with my Grand Nestabilities and then layered another on top so you get a completely round card.  I made sure that I got the scallops positioned correctly so it stands up without wobbling.

I've recently learnt how to scan my Nestabilities into my Cameo and cut out a slightly larger mat.  I did this for the black layers on the scallop and banner.  It's so much easier than drawing around them and cutting them out by hand.

I used one of my favourite techniques of stamping a circular border.  The poem mentions "Eight tiny reindeer" so I originally tried it with a reindeer stamped eight times.  It was a bit large and overpowered the main image though.  The little Santa in his sleigh stamp looked much nicer.   Unfortunately that means that there are 16 reindeer, but the thought was there!  :-)

Sunday, 9 September 2012

'Twas the Night Before Christmas Clarity Stamp - Father Christmas


Hubby thought this one was too busy, but as the main image isn't I thought it could handle more of a patterned background.  It was quite simple, just two Clarity stamps and a matching red scalloped mat cut on my Cameo.

I used the Holly Corner stamp to make a frame for Santa and a matching background design.  The berries and hat were coloured with a Sakura Glaze pen.  I added some pale grey to Santa's beard with a ProMarker, before I added the glitter.  I then finished it off with some Glossy Accents on Santa's glasses.

You certainly couldn't miss it on TV!  LOL


Related Posts Plugin for WordPress, Blogger...